


Page 38 - CC2018_AI_Look_Inside
P. 38
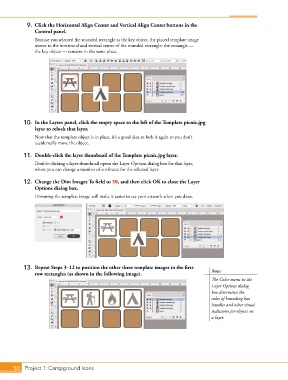
9.  Click the Horizontal Align Center and Vertical Align Center buttons in the
               Control panel.

               Because you selected the rounded rectangle as the key object, the placed template image
               moves to the horizontal and vertical center of the rounded rectangle; the rectangle —
               the key object — remains in the same place.


           10.  In the Layers panel, click the empty space to the left of the Template picnic.jpg
               layer to relock that layer.
               Now that the template object is in place, it’s a good idea to lock it again so you don’t
               accidentally move the object.

           11.  Double-click the layer thumbnail of the Template picnic.jpg layer.
               Double-clicking a layer thumbnail opens the Layer Options dialog box for that layer,
               where you can change a number of attributes for the selected layer.

           12.  Change the Dim Images To field to 30, and then click OK to close the Layer
               Options dialog box.
               Dimming the template image will make it easier to see your artwork when you draw.


           13.  Repeat Steps 3–12 to position the other three template images in the first-  Note:
               row rectangles (as shown in the following image).
                                                                                        The Color menu in the
                                                                                        Layer Options dialog
                                                                                        box determines the
                                                                                        color of bounding box
                                                                                        handles and other visual
                                                                                        indicators for objects on
                                                                                        a layer.


       50 Project 1: Campground Icons

