


Page 22 - CC2017_WD_Look_Inside
P. 22
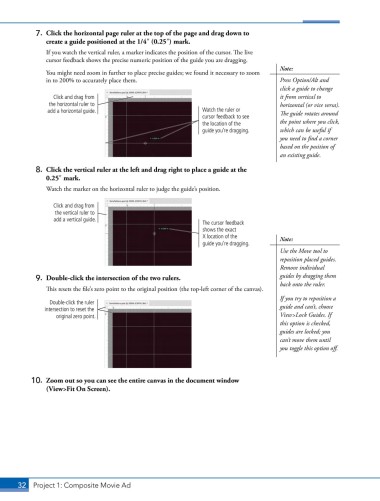
7.  Click the horizontal page ruler at the top of the page and drag down to
               create a guide positioned at the 1/43 (0.253) mark.

               If you watch the vertical ruler, a marker indicates the position of the cursor. The live
               cursor feedback shows the precise numeric position of the guide you are dragging.
                                                                                        Note:
               You might need zoom in further to place precise guides; we found it necessary to zoom
               in to 200% to accurately place them.                                     Press Option/Alt and
                                                                                        click a guide to change
                  Click and drag from                                                   it from vertical to
                the horizontal ruler to                                                 horizontal (or vice versa).
                add a horizontal guide.                         Watch the ruler or      The guide rotates around
                                                                cursor feedback to see
                                                                the location of the     the point where you click,
                                                                guide you’re dragging.  which can be useful if
                                                                                        you need to find a corner
                                                                                        based on the position of
                                                                                        an existing guide.
            8.  Click the vertical ruler at the left and drag right to place a guide at the
               0.253 mark.
               Watch the marker on the horizontal ruler to judge the guide’s position.


                  Click and drag from
                  the vertical ruler to
                  add a vertical guide.
                                                                The cursor feedback
                                                                shows the exact
                                                                X location of the       Note:
                                                                guide you’re dragging.
                                                                                        Use the Move tool to
                                                                                        reposition placed guides.
                                                                                        Remove individual
            9.  Double-click the intersection of the two rulers.                        guides by dragging them
                                                                                        back onto the ruler.
               This resets the file’s zero point to the original position (the top-left corner of the canvas).
                                                                                        If you try to reposition a
                 Double-click the ruler
               intersection to reset the                                                guide and can’t, choose
                   original zero point.                                                 View>Lock Guides. If
                                                                                        this option is checked,
                                                                                        guides are locked; you
                                                                                        can’t move them until
                                                                                        you toggle this option off.


           10.  Zoom out so you can see the entire canvas in the document window
               (View>Fit On Screen).


       32 Project 1: Composite Movie Ad

