


Page 21 - CC2017_WD_Look_Inside
P. 21
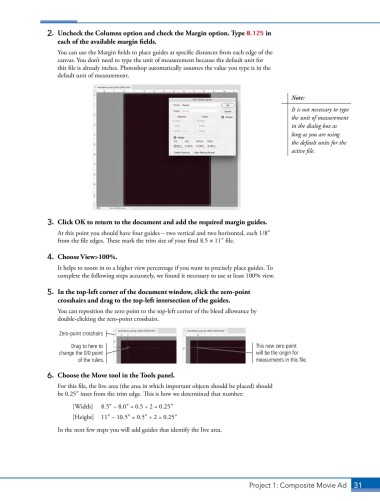
2.  Uncheck the Columns option and check the Margin option. Type 0.125 in
                   each of the available margin fields.

                   You can use the Margin fields to place guides at specific distances from each edge of the
                   canvas. You don’t need to type the unit of measurement because the default unit for
                   this file is already inches. Photoshop automatically assumes the value you type is in the
                   default unit of measurement.


                                                                                            Note:

                                                                                            It is not necessary to type
                                                                                            the unit of measurement
                                                                                            in the dialog box as
                                                                                            long as you are using
                                                                                            the default units for the
                                                                                            active file.


                3.  Click OK to return to the document and add the required margin guides.

                   At this point you should have four guides – two vertical and two horizontal, each 1/83
                   from the file edges. These mark the trim size of your final 8.5 1 113 file.

                4.  Choose View>100%.

                   It helps to zoom in to a higher view percentage if you want to precisely place guides. To
                   complete the following steps accurately, we found it necessary to use at least 100% view.

                5.  In the top-left corner of the document window, click the zero-point
                   crosshairs and drag to the top-left intersection of the guides.
                   You can reposition the zero point to the top-left corner of the bleed allowance by
                   double-clicking the zero-point crosshairs.
                    Zero-point crosshairs

                       Drag to here to                                           This new zero point
                   change the 0/0 point                                          will be the origin for
                         of the rulers.                                          measurments in this file.
                6.  Choose the Move tool in the Tools panel.

                   For this file, the live area (the area in which important objects should be placed) should
                   be 0.253 inset from the trim edge. This is how we determined that number:

                        [Width]   8.53 – 8.03 = 0.5 ÷ 2 = 0.253
                        [Height]   113 – 10.53 = 0.53 ÷ 2 = 0.253
                   In the next few steps you will add guides that identify the live area.


                                                                               Project 1: Composite Movie Ad    31

