


Page 16 - CC2017_WD_Look_Inside
P. 16
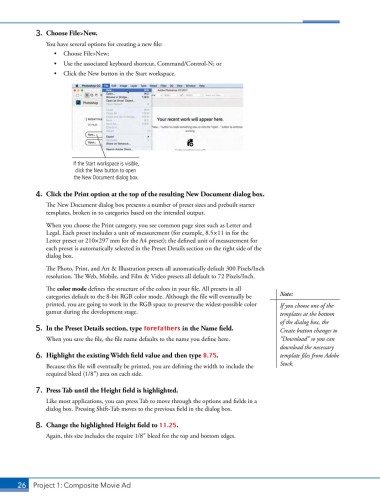
3.  Choose File>New.
               You have several options for creating a new file:
                  •  Choose File>New;
                  •  Use the associated keyboard shortcut, Command/Control-N; or
                  •  Click the New button in the Start workspace.


                        If the Start workspace is visible,
                        click the New button to open
                        the New Document dialog box.

            4.  Click the Print option at the top of the resulting New Document dialog box.
               The New Document dialog box presents a number of preset sizes and prebuilt starter
               templates, broken in to categories based on the intended output.
               When you choose the Print category, you see common page sizes such as Letter and
               Legal. Each preset includes a unit of measurement (for example, 8.5111 in for the
               Letter preset or 2101297 mm for the A4 preset); the defined unit of measurement for
               each preset is automatically selected in the Preset Details section on the right side of the
               dialog box.

               The Photo, Print, and Art & Illustration presets all automatically default 300 Pixels/Inch
               resolution. The Web, Mobile, and Film & Video presets all default to 72 Pixels/Inch.

               The color mode defines the structure of the colors in your file. All presets in all
               categories default to the 8-bit RGB color mode. Although the file will eventually be   Note:
               printed, you are going to work in the RGB space to preserve the widest-possible color   If you choose one of the
               gamut during the development stage.                                      templates at the bottom
                                                                                        of the dialog box, the
            5.  In the Preset Details section, type forefathers in the Name field.      Create button changes to

               When you save the file, the file name defaults to the name you define here.  “Download” so you can
                                                                                        download the necessary
            6.  Highlight the existing Width field value and then type 8.75.            template files from Adobe
               Because this file will eventually be printed, you are defining the width to include the   Stock.
               required bleed (1/83) area on each side.

            7.  Press Tab until the Height field is highlighted.

               Like most applications, you can press Tab to move through the options and fields in a
               dialog box. Pressing Shift-Tab moves to the previous field in the dialog box.

            8.  Change the highlighted Height field to 11.25.
               Again, this size includes the require 1/83 bleed for the top and bottom edges.


       26 Project 1: Composite Movie Ad

