


Page 23 - CS6_ID_Look_Inside
P. 23
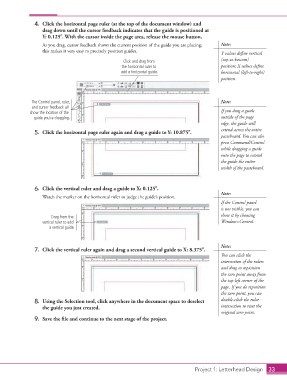
4. Click the horizontal page ruler (at the top of the document window) and
drag down until the cursor feedback indicates that the guide is positioned at
Y: 0.125. With the cursor inside the page area, release the mouse button.
As you drag, cursor feedback shows the current position of the guide you are placing; Note:
this makes it very easy to precisely position guides.
Y values define vertical
Click and drag from (top-to-bottom)
the horizontal ruler to position; X values define
add a horizontal guide. horizontal (left-to-right)
position.
The Control panel, ruler, Note:
and cursor feedback all
show the location of the If you drag a guide
guide you’re dragging. outside of the page
edge, the guide will
extend across the entire
5. Click the horizontal page ruler again and drag a guide to Y: 10.875.
pasteboard. You can also
press Command/Control
while dragging a guide
onto the page to extend
the guide the entire
width of the pasteboard.
6. Click the vertical ruler and drag a guide to X: 0.125.
Watch the marker on the horizontal ruler to judge the guide’s position. Note:
If the Control panel
is not visible, you can
Drag from the show it by choosing
vertical ruler to add Window>Control.
a vertical guide.
Note:
7. Click the vertical ruler again and drag a second vertical guide to X: 8.375.
You can click the
intersection of the rulers
and drag to reposition
the zero point away from
the top-left corner of the
page. If you do reposition
the zero point, you can
8. Using the Selection tool, click anywhere in the document space to deselect double-click the ruler
the guide you just created. intersection to reset the
original zero point.
9. Save the file and continue to the next stage of the project.
Project 1: Letterhead Design 33

