


Page 47 - CC2018_ID_Look_Inside
P. 47
9.  Open the Interface pane of the Preferences dialog box. Choose Immediate    Note:
                   in the Live Screen Drawing menu, then click OK.
                                                                                            Remember, preferences
                   Live Screen Drawing controls                                             are accessed in the
                   the appearance of an image                                               InDesign menu on
                   when you move or resize it.                                              Macintosh and in the
                   The default behavior, Delayed,                                           Edit menu on Windows.
                   means the image does not
                   appear inside the frame
                   while you change the frame
                   parameters (position, etc.).
                   Using the Immediate Live
                   Screen Drawing option, the
                   image inside the frame always
                   appears inside the frame when
                   you move or resize the frame.
                   If Delayed is selected, you
                   can click and hold down the
                   mouse button for a couple of
                   seconds to temporarily access
                   the Immediate preview behavior.
                                                                                            Note:
               10.  With the placed image selected, check the Auto-Fit option in the
                   Control panel.                                                           Press Shift while dragging
                                                                                            a corner to maintain the
                   If you don’t see the Auto-Fit option in the Control panel, you can customize the Control   original height-to-width
                   panel to show that option, or you can choose Object>Fitting>Frame Fitting Options,   aspect ratio in the resized
                   and check the Auto-Fit option in the resulting dialog box.
                                                                                            frame.
               11.  Click the bottom-right corner of the frame, then drag up to make the frame
                   smaller. When cursor feedback shows the frame is 1.6 in high, release the   Note:
                   mouse button.
                                                                                            When the Auto-Fit
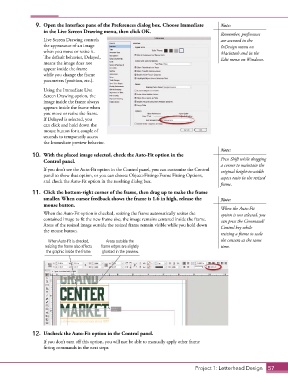
                   When the Auto-Fit option is checked, resizing the frame automatically resizes the   option is not selected, you
                   contained image to fit the new frame size; the image remains centered inside the frame.   can press the Command/
                   Areas of the resized image outside the resized frame remain visible while you hold down   Control key while
                   the mouse button.
                                                                                            resizing a frame to scale
                     When Auto-Fit is checked,   Areas outside the                          the content at the same
                   resizing the frame also affects   frame edges are slightly               time.
                    the graphic inside the frame.  ghosted in the preview.


               12.  Uncheck the Auto-Fit option in the Control panel.
                   If you don’t turn off this option, you will not be able to manually apply other frame
                   fitting commands in the next steps.


                                                                                  Project 1: Letterhead Design  57

