


Page 37 - CC2018_ID_Look_Inside
P. 37
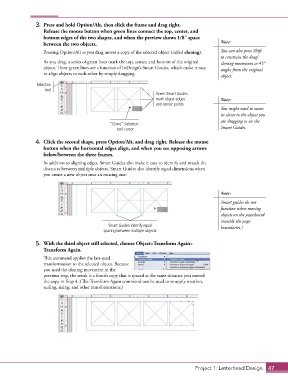
3.  Press and hold Option/Alt, then click the frame and drag right.
                   Release the mouse button when green lines connect the top, center, and
                   bottom edges of the two shapes, and when the preview shows 1/8″ space
                   between the two objects.                                                 Note:

                   Pressing Option/Alt as you drag moves a copy of the selected object (called cloning).  You can also press Shift
                                                                                            to constrain the drag/
                   As you drag, a series of green lines mark the top, center, and bottom of the original   cloning movement to 45°
                   object. These green lines are a function of InDesign’s Smart Guides, which make it easy   angles from the original
                   to align objects to each other by simply dragging.
                                                                                            object.
                Selection
                   tool
                                                                 Green Smart Guides
                                                                 mark object edges          Note:
                                                                 and center points.
                                                                                            You might need to zoom
                                                                                            in closer to the object you
                                                                                            are dragging to see the
                                              “Clone” Selection
                                                 tool cursor                                Smart Guides.

                4.  Click the second shape, press Option/Alt, and drag right. Release the mouse
                   button when the horizontal edges align, and when you see opposing arrows
                   below/between the three frames.
                   In addition to aligning edges, Smart Guides also make it easy to identify and match the
                   distances between multiple objects. Smart Guides also identify equal dimensions when
                   you create a new object near an existing one.


                                                                                            Note:
                                                                                            Smart guides do not
                                                                                            function when moving
                                                                                            objects on the pasteboard
                                                                                            (outside the page
                                              Smart Guides identify equal                   boundaries.)
                                            spacing between multiple objects.

                5.  With the third object still selected, choose Object>Transform Again>
                   Transform Again.
                   This command applies the last-used
                   transformation to the selected object. Because
                   you used the cloning movement in the
                   previous step, the result is a fourth copy that is spaced at the same distance you moved
                   the copy in Step 4. (The Transform Again command can be used to re-apply rotation,
                   scaling, sizing, and other transformations.)


                                                                                  Project 1: Letterhead Design  47

