
Page 67 - Adobe Photoshop and Dreamviewer 2021
P. 67
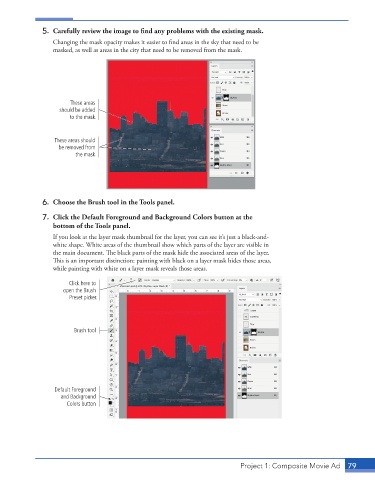
5.  Carefully review the image to find any problems with the existing mask.
                 Changing the mask opacity makes it easier to find areas in the sky that need to be
                 masked, as well as areas in the city that need to be removed from the mask.


                      These areas
                   should be added
                      to the mask.


                  These areas should
                   be removed from
                        the mask.


              6.  Choose the Brush tool in the Tools panel.
              7.  Click the Default Foreground and Background Colors button at the
                 bottom of the Tools panel.
                 If you look at the layer mask thumbnail for the layer, you can see it’s just a black-and-
                 white shape. White areas of the thumbnail show which parts of the layer are visible in
                 the main document. The black parts of the mask hide the associated areas of the layer.
                 This is an important distinction: painting with black on a layer mask hides those areas,
                 while painting with white on a layer mask reveals those areas.

                      Click here to
                    open the Brush
                      Preset picker.


                        Brush tool


                  Default Foreground
                    and Background
                     Colors button


                                                                          Project 1: Composite Movie Ad    79