
Page 24 - Adobe Photoshop and Dreamviewer 2021
P. 24
7. Press Return/Enter to finalize the crop.
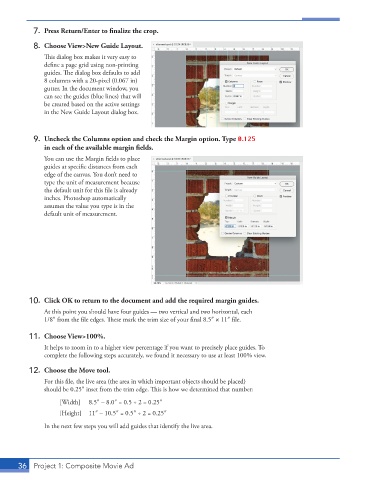
8. Choose View>New Guide Layout.
This dialog box makes it very easy to
define a page grid using non-printing
guides. The dialog box defaults to add
8 columns with a 20-pixel (0.067 in)
gutter. In the document window, you
can see the guides (blue lines) that will
be created based on the active settings
in the New Guide Layout dialog box.
9. Uncheck the Columns option and check the Margin option. Type 0.125
in each of the available margin fields.
You can use the Margin fields to place
guides at specific distances from each
edge of the canvas. You don’t need to
type the unit of measurement because
the default unit for this file is already
inches. Photoshop automatically
assumes the value you type is in the
default unit of measurement.
10. Click OK to return to the document and add the required margin guides.
At this point you should have four guides — two vertical and two horizontal, each
1/8″ from the file edges. These mark the trim size of your final 8.5″ 1 11″ file.
11. Choose View>100%.
It helps to zoom in to a higher view percentage if you want to precisely place guides. To
complete the following steps accurately, we found it necessary to use at least 100% view.
12. Choose the Move tool.
For this file, the live area (the area in which important objects should be placed)
should be 0.25″ inset from the trim edge. This is how we determined that number:
[Width] 8.5″ – 8.0″ = 0.5 ÷ 2 = 0.25″
[Height] 11″ – 10.5″ = 0.5″ ÷ 2 = 0.25″
In the next few steps you will add guides that identify the live area.
36 Project 1: Composite Movie Ad