


Page 49 - CS6_PS_Look_Inside
P. 49
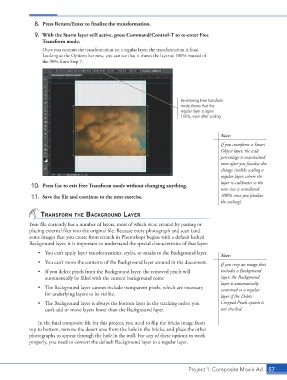
8.  Press Return/Enter to finalize the transformation.

                    9.  With the Storm layer still active, press Command/Control-T to re-enter Free
                        Transform mode.
                        Once you commit the transformation on a regular layer, the transformation is final.
                        Looking at the Options bar now, you can see that it shows the layer at 100% instead of
                        the 90% from Step 7.


                                                                                Re-entering Free Transform
                                                                                mode shows that the
                                                                                regular layer is again
                                                                                100%, even after scaling.


                                                                                                 Note:

                                                                                                 If you transform a Smart
                                                                                                 Object layer, the scale
                                                                                                 percentage is maintained
                                                                                                 even after you finalize the
                                                                                                 change (unlike scaling a
                                                                                                 regular layer, where the
                                                                                                 layer re-calibrates so the
                   10.  Press Esc to exit Free Transform mode without changing anything.
                                                                                                 new size is considered
                   11.  Save the file and continue to the next exercise.                         100% once you finalize
                                                                                                 the scaling).


                       trAnsforM tHe bAckground lAyer
                  Your file currently has a number of layers, most of which were created by pasting or
                  placing external files into the original file. Because every photograph and scan (and
                  some images that you create from scratch in Photoshop) begins with a default locked
                  Background layer, it is important to understand the special characteristics of that layer:
                      •  You can’t apply layer transformations, styles, or masks to the Background layer.
                                                                                                 Note:
                      •  You can’t move the contents of the Background layer around in the document.  If you crop an image that
                      •  If you delete pixels from the Background layer, the removed pixels will   includes a Background
                         automatically be filled with the current background color.              layer, the Background
                                                                                                 layer is automatically
                      •  The Background layer cannot include transparent pixels, which are necessary   converted to a regular
                         for underlying layers to be visible.                                    layer if the Delete
                      •  The Background layer is always the bottom layer in the stacking order; you   Cropped Pixels option is
                         can’t add or move layers lower than the Background layer.               not checked.

                      In the final composite file for this project, you need to flip the bricks image from
                  top to bottom, remove the desert area from the hole in the bricks, and place the other
                  photographs to appear through the hole in the wall. For any of these options to work
                  properly, you need to convert the default Background layer to a regular layer.


                                                                                    Project 1: Composite Movie Ad   57

