


Page 52 - CS6_PS_Look_Inside
P. 52
Stage 3  Creating Complex Selections


               At this stage of the project, you still have a few issues to resolve: some of the images are still randomly
               stacked on top of one another, and some images have areas that are hiding other images (the blue sky
               in the Skyline layer, for example). In this stage, you start fixing these problems.
                  Virtually any Photoshop project involves making some kind of selection. Making selections is so
               important, in fact, that there are no fewer than nine tools dedicated specifically to this goal, as well as a
               whole Select menu and a few other options for making and refining selections.
                  In an earlier lesson you learned how to use the Rectangular Marquee tool to draw simple
               selections. In the next series of exercises, you use several other selection methods to isolate pixels from
               their backgrounds (called silhouetting).


                   MAke A feAtHered selection

                 1.  With aftermath.psd open, hide all but the Lightning layer. Click the
                    Lightning layer to make it active.

                 2.  Select the Lasso tool in the Tools panel.

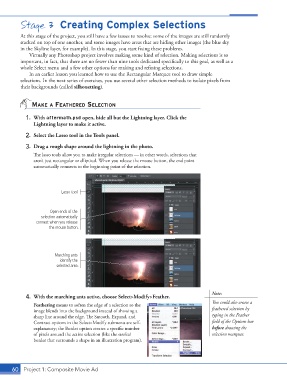
                 3.  Drag a rough shape around the lightning in the photo.
                    The lasso tools allow you to make irregular selections — in other words, selections that
                    aren’t just rectangular or elliptical. When you release the mouse button, the end point
                    automatically connects to the beginning point of the selection.


                                Lasso tool


                           Open ends of the
                       selection automatically
                     connect when you release
                           the mouse button.


                             Marching ants
                               identify the
                              selected area.


                                                                                             Note:
                 4.  With the marching ants active, choose Select>Modify>Feather.
                                                                                             You could also create a
                    Feathering means to soften the edge of a selection so the
                    image blends into the background instead of showing a                    feathered selection by
                    sharp line around the edge. The Smooth, Expand, and                      typing in the Feather
                    Contract options in the Select>Modify submenu are self-                  field of the Options bar
                    explanatory; the Border option creates a specific number                 before drawing the
                    of pixels around the active selection (like the stroke/                  selection marquee.
                    border that surrounds a shape in an illustration program).


           60 Project 1: Composite Movie Ad

