


Page 58 - CS6_ID_Look_Inside
P. 58
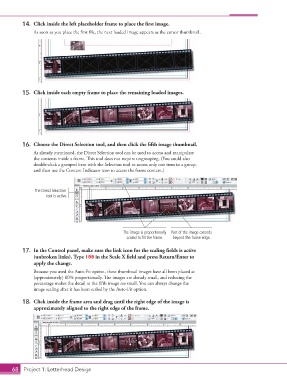
14.  Click inside the left placeholder frame to place the first image.
                    As soon as you place the first file, the next loaded image appears as the cursor thumbnail.


                15.  Click inside each empty frame to place the remaining loaded images.


                16.  Choose the Direct Selection tool, and then click the fifth image thumbnail.
                    As already mentioned, the Direct Selection tool can be used to access and manipulate
                    the contents inside a frame. This tool does not require ungrouping. (You could also
                    double-click a grouped item with the Selection tool to access only one item in a group,
                    and then use the Content Indicator icon to access the frame content.)


                     The Direct Selection
                         tool is active.


                                                         The image is proportionally  Part of the image extends
                                                          scaled to fill the frame.  beyond the frame edge.

                17.  In the Control panel, make sure the link icon for the scaling fields is active
                    (unbroken links). Type 100 in the Scale X field and press Return/Enter to
                    apply the change.
                    Because you used the Auto-Fit option, these thumbnail images have all been placed at
                    (approximately) 80% proportionally. The images are already small, and reducing the
                    percentage makes the detail in the fifth image too small. You can always change the
                    image scaling after it has been scaled by the Auto-Fit option.


                18.  Click inside the frame area and drag until the right edge of the image is
                    approximately aligned to the right edge of the frame.


           68 Project 1: Letterhead Design

