


Page 45 - CS6_DW_Look_Inside
P. 45
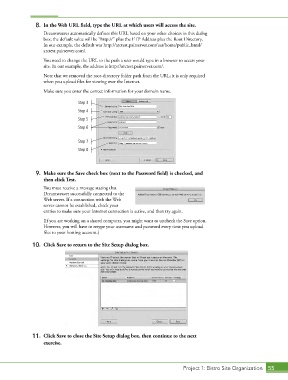
8.  In the Web URL field, type the URL at which users will access the site.
                   Dreamweaver automatically defines this URL based on your other choices in this dialog
                   box; the default value will be “http://” plus the FTP Address plus the Root Directory.
                   In our example, the default was http://atctest.pairserver.com/usr/home/public_html/
                   atctest.pairserver.com/.

                   You need to change the URL to the path a user would type in a browser to access your
                   site. In our example, the address is http://atctest.pairserver.com/.

                   Note that we removed the root-directory folder path from the URL; it is only required
                   when you upload files for viewing over the Internet.

                   Make sure you enter the correct information for your domain name.

                                 Step 3
                                 Step 4
                                 Step 5
                                 Step 6


                                 Step 7
                                 Step 8


                9.  Make sure the Save check box (next to the Password field) is checked, and
                   then click Test.

                   You must receive a message stating that
                   Dreamweaver successfully connected to the
                   Web server. If a connection with the Web
                   server cannot be established, check your
                   entries to make sure your Internet connection is active, and then try again.
                   (If you are working on a shared computer, you might want to uncheck the Save option.
                   However, you will have to retype your username and password every time you upload
                   files to your hosting account.)

               10.  Click Save to return to the Site Setup dialog box.


               11.  Click Save to close the Site Setup dialog box, then continue to the next
                   exercise.


                                                                             Project 1: Bistro Site Organization  55

