


Page 47 - CS6_DW_Look_Inside
P. 47
6.  Click OK to put the files onto the remote site.
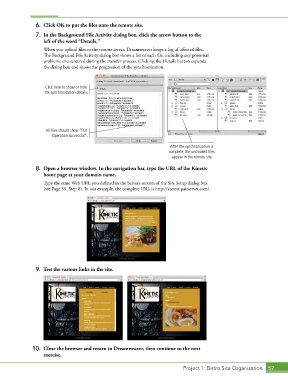
                7.  In the Background File Activity dialog box, click the arrow button to the
                   left of the word “Details.”
                   When you upload files to the remote server, Dreamweaver keeps a log of affected files.
                   The Background File Activity dialog box shows a list of each file, including any potential
                   problems encountered during the transfer process. Clicking the Details button expands
                   the dialog box and shows the progression of the synchronization.


                    Click here to show or hide
                   the synchronization details.


                    All files should show “Put
                       Operation successful”.

                                                                       After the synchronization is
                                                                       complete, the uncloaked files
                                                                        appear in the remote site.
                8.  Open a browser window. In the navigation bar, type the URL of the Kinetic
                   home page at your domain name.
                   Type the same Web URL you defined in the Servers section of the Site Setup dialog box
                   (see Page 55, Step 8). In our example, the complete URL is http://atctest.pairserver.com/.


                9.  Test the various links in the site.


               10.  Close the browser and return to Dreamweaver, then continue to the next
                   exercise.


                                                                             Project 1: Bistro Site Organization  57

