


Page 22 - CS6_DW_Look_Inside
P. 22
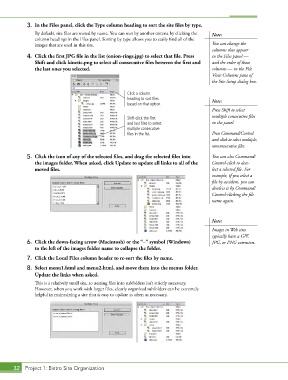
3.  In the Files panel, click the Type column heading to sort the site files by type.
               By default, site files are sorted by name. You can sort by another criteria by clicking the   Note:
               column headings in the Files panel. Sorting by type allows you to easily find all of the
               images that are used in this site.                                       You can change the
                                                                                        columns that appear
            4.  Click the first JPG file in the list (onion-rings.jpg) to select that file. Press   in the Files panel —
               Shift and click kinetic.png to select all consecutive files between the first and   and the order of those
               the last ones you selected.                                              columns — in the File
                                                                                        View Columns pane of
                                                                                        the Site Setup dialog box.

                                                      Click a column
                                                      heading to sort files             Note:
                                                      based on that option.
                                                                                        Press Shift to select
                                                      Shift-click the first             multiple consecutive files
                                                      and last files to select          in the panel.
                                                      multiple consecutive
                                                      files in the list.                Press Command/Control
                                                                                        and click to select multiple,
                                                                                        nonconsecutive files.

            5.  Click the icon of any of the selected files, and drag the selected files into   You can also Command/
               the images folder. When asked, click Update to update all links to all of the   Control-click to dese-
               moved files.                                                             lect a selected file. For
                                                                                        example, if you select a
                                                                                        file by accident, you can
                                                                                        deselect it by Command/
                                                                                        Control-clicking the file
                                                                                        name again.


                                                                                        Note:

                                                                                        Images in Web sites
                                                                                        typically have a GIF,
            6.  Click the down-facing arrow (Macintosh) or the “–” symbol (Windows)     JPG, or PNG extension.
               to the left of the images folder name to collapse the folder.

            7.  Click the Local Files column header to re-sort the files by name.
            8.  Select menu1.html and menu2.html, and move them into the menus folder.
               Update the links when asked.
               This is a relatively small site, so nesting files into subfolders isn’t strictly necessary.
               However, when you work with larger files, clearly organized subfolders can be extremely
               helpful in maintaining a site that is easy to update as often as necessary.


       32 Project 1: Bistro Site Organization

