


Page 20 - CS6_DW_Look_Inside
P. 20
5.  Click to again select the site folder at the top of the Files panel. Control/
               right-click the site folder and choose New Folder from the contextual menu.

               If you don’t select the site folder first, the new folder would be created inside of the
               resources folder that you just created. You want another folder at the same level as the
               resources folder — in the main level of the site root folder — so you first have to select
               the site folder as the target location for the second new folder.
                                                                                        Note:
            6.  Type images and press Return/Enter to apply the new folder name.        You can create a new
               Web design convention dictates image files be placed in a folder named “images” for   folder inside an existing
               easier organization. If you have many photos in various categories, you might want to   folder (called nesting) by
               create additional nested folders inside the main images folder.          Control/right-clicking the
                                                                                        existing folder — instead
            7.  Repeat Steps 5–6 to create another new folder named menus in the site root   of the root folder — and
               folder.
                                                                                        choosing New Folder
            8.  Refresh the list in the Files panel.                                    from the contextual
                                                                                        menu.


            9.  Continue to the next exercise.

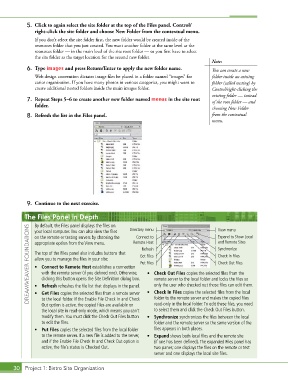
           The Files Panel in Depth                   Directory menu                       View menu
               By default, the Files panel displays the files on
             DREAMWEAVER FOUNDATIONS  appropriate option from the View menu.  Remote Host remote server to the local folder and locks the files so
               your local computer. You can also view the files
                                                                                           Expand to Show Local
               on the remote or testing servers by choosing the
                                                         Connect to
                                                                                           and Remote Sites
                                                                                           Synchronize
                                                            Refresh
               The top of the Files panel also includes buttons that
                                                                                           Check In Files
                                                           Get Files
               allow you to manage the files in your site:
                                                           Put Files
                                                                                           Check Out Files
               •  Connect to Remote Host establishes a connection
                  with the remote server (if you defined one). Otherwise,
                                                              •  Check Out Files copies the selected files from the
                  clicking this button opens the Site Definition dialog box.
                                                                 only the user who checked out those files can edit them.
               •  Refresh refreshes the file list that displays in the panel.
               •  Get Files copies the selected files from a remote server
                                                                 folder to the remote server and makes the copied files
                  to the local folder. If the Enable File Check In and Check
                                                                 read-only in the local folder. To edit these files, you need
                  Out option is active, the copied files are available on   •  Check In Files copies the selected files from the local
                  the local site in read-only mode, which means you can’t   to select them and click the Check Out Files button.
                  modify them. You must click the Check Out Files button   •  Synchronize synchronizes the files between the local
                  to edit the files.                             folder and the remote server so the same version of the
               •  Put Files copies the selected files from the local folder   files appears in both places.
                  to the remote server. If a new file is added to the server,   •  Expand shows both local files and the remote site
                  and if the Enable File Check In and Check Out option is   (if one has been defined). The expanded Files panel has
                  active, the file’s status is Checked Out.      two panes; one displays the files on the remote or test
                                                                 server and one displays the local site files.


       30 Project 1: Bistro Site Organization

