


Page 61 - CC2018_WD_Look_Inside
P. 61
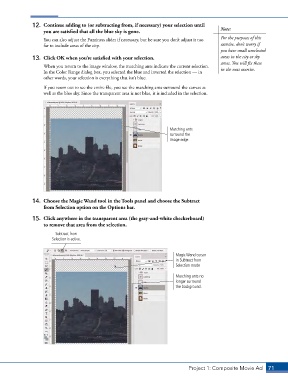
12.  Continue adding to (or subtracting from, if necessary) your selection until
                   you are satisfied that all the blue sky is gone.                         Note:

                   You can also adjust the Fuzziness slider if necessary, but be sure you don’t adjust it too   For the purposes of this
                   far to include areas of the city.                                        exercise, don’t worry if
                                                                                            you have small unselected
               13.  Click OK when you’re satisfied with your selection.                     areas in the city or sky
                                                                                            areas. You will fix these
                   When you return to the image window, the marching ants indicate the current selection.
                   In the Color Range dialog box, you selected the blue and inverted the selection — in   in the next exercise.
                   other words, your selection is everything that isn’t blue.

                   If you zoom out to see the entire file, you see the marching ants surround the canvas as
                   well as the blue sky. Since the transparent area is not blue, it is included in the selection.


                                                                       Marching ants
                                                                       surround the
                                                                       image edge.


               14.  Choose the Magic Wand tool in the Tools panel and choose the Subtract
                   from Selection option on the Options bar.

               15.  Click anywhere in the transparent area (the gray-and-white checkerboard)
                   to remove that area from the selection.

                        Subtract from
                      Selection is active.


                                                                          Magic Wand cursor
                                                                          in Subtract from
                                                                          Selection mode
                                                                          Marching ants no
                                                                          longer surround
                                                                          the background.


                                                                               Project 1: Composite Movie Ad    71

