


Page 67 - CC2017_WD_Look_Inside
P. 67
Stage 5 Saving Files for Multiple Media
At the beginning of the project, you saved this file in Photoshop’s native format (PSD). However,
many Photoshop projects require saving the completed file in at least one other format. Many artists
prefer to leave all files in the PSD format since there is only one file to track. Others prefer to send
only flattened TIFF files of their artwork because the individual elements can’t be changed.
Ultimately, the format (or formats, if the file is being used in multiple places) you use will depend
on where and how the file is being placed. For this project, you have been asked to create a flattened,
high-resolution, CMYK TIFF file and a low-resolution JPEG file for use on a Web site.
sAve A flAt tiff file
The printed magazine suggests that ads created in Photoshop be submitted as flat TIFF
files. Since you designed the ad to incorporate bleeds for pages up to 8.5 1 11, all you
have to do for this version is save the file in the appropriate format.
1. With forefathers.psd open, choose File>Save As.
2. If necessary, navigate to your WIP>Liberty folder as the target location for
saving the final files.
The Save As dialog box defaults to the last-used location. If you continued the entire way
through this project without stopping, you won’t have to navigate.
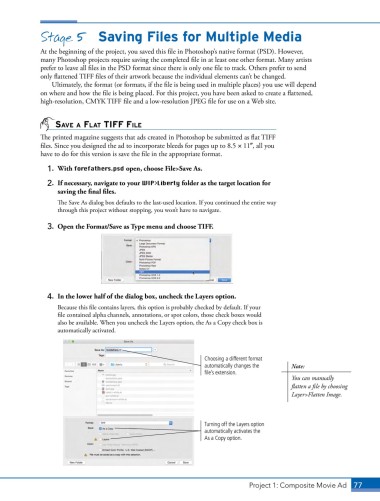
3. Open the Format/Save as Type menu and choose TIFF.
4. In the lower half of the dialog box, uncheck the Layers option.
Because this file contains layers, this option is probably checked by default. If your
file contained alpha channels, annotations, or spot colors, those check boxes would
also be available. When you uncheck the Layers option, the As a Copy check box is
automatically activated.
Choosing a different format
automatically changes the Note:
file’s extension.
You can manually
flatten a file by choosing
Layer>Flatten Image.
Turning off the Layers option
automatically activates the
As a Copy option.
Project 1: Composite Movie Ad 77

