


Page 72 - CC2018_PS_Look_Inside
P. 72
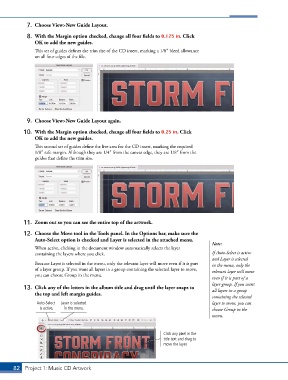
7.  Choose View>New Guide Layout.
            8.  With the Margin option checked, change all four fields to 0.125 in. Click
               OK to add the new guides.
               This set of guides defines the trim size of the CD insert, marking a 1/8″ bleed allowance
               on all four edges of the file.


            9.  Choose View>New Guide Layout again.

           10.  With the Margin option checked, change all four fields to 0.25 in. Click
               OK to add the new guides.
               This second set of guides define the live area for the CD insert, marking the required
               1/8″ safe margin. Although they are 1/4″ from the canvas edge, they are 1/8″ from the
               guides that define the trim size.


           11.  Zoom out so you can see the entire top of the artwork.

           12.  Choose the Move tool in the Tools panel. In the Options bar, make sure the
               Auto-Select option is checked and Layer is selected in the attached menu.
                                                                                        Note:
               When active, clicking in the document window automatically selects the layer
               containing the layers where you click.                                   If Auto-Select is active
                                                                                        and Layer is selected
               Because Layer is selected in the menu, only the relevant layer will move even if it is part   in the menu, only the
               of a layer group. If you want all layers in a group containing the selected layer to move,   relevant layer will move
               you can choose Group in the menu.
                                                                                        even if it is part of a
                                                                                        layer group. If you want
           13.  Click any of the letters in the album title and drag until the layer snaps to   all layers in a group
               the top and left margin guides.
                                                                                        containing the selected
                Auto-Select   Layer is selected                                         layer to move, you can
                 is active.  in the menu.                                               choose Group in the
                                                                                        menu.


                                                                     Click any pixel in the
                                                                     title text and drag to
                                                                     move the layer.


       82 Project 1: Music CD Artwork

