


Page 71 - CC2018_PS_Look_Inside
P. 71
rEducE thE physIcal fIlE sIzE
              The CD insert artwork needs to be approximately half the size of the album artwork.
              Reducing the file’s physical size is an easy process, although you need to check the
              positioning of various elements to make sure they meet the output requirements.
              In this exercise you will reduce the file’s physical size, then make necessary layer
              adjustments to meet the needs of the CD insert.

                1.  With cd-artwork.psd open in Photoshop, choose Image>Image Size.

                2.  Make sure the Resample option is checked.
                   You are resizing this image, which means you are changing the physical dimensions (and
                   the actual number of pixels in the file). If Resample was not checked, you would simply
                   be redistributing the same number of pixels across a different physical space.

                3.  With Inches selected in the Width and Height Units menus, type 5 in the
                   Width field.
                   The CD insert is 4.75″ square, but it requires 1/8″ bleeds on all four sides:
                            4.75″ + 0.125″ + 0.125″ = 5″

                   Because the width and height are constrained by default, changing one value applies a
                   proportional change to the other value.


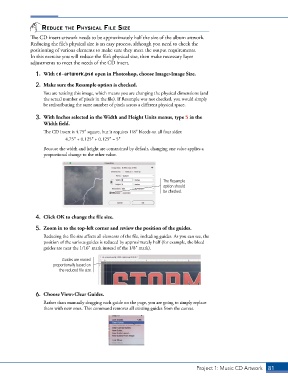
                                                                    The Resample
                                                                    option should
                                                                    be checked.


                4.  Click OK to change the file size.

                5.  Zoom in to the top-left corner and review the position of the guides.
                   Reducing the file size affects all elements of the file, including guides. As you can see, the
                   position of the various guides is reduced by approximately half (for example, the bleed
                   guides are near the 1/16″ mark instead of the 1/8″ mark).

                           Guides are moved
                       proportionally based on
                          the reduced file size.


                6.  Choose View>Clear Guides.
                   Rather than manually dragging each guide on the page, you are going to simply replace
                   them with new ones. This command removes all existing guides from the canvas.


                                                                                  Project 1: Music CD Artwork   81

