


Page 32 - CC2017_ID_Look_Inside
P. 32
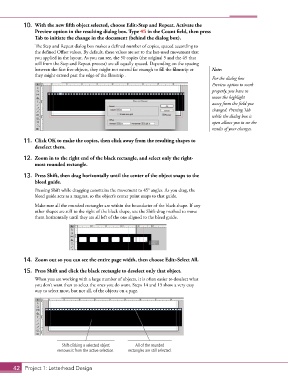
10.  With the new fifth object selected, choose Edit>Step and Repeat. Activate the
               Preview option in the resulting dialog box. Type 45 in the Count field, then press
               Tab to initiate the change in the document (behind the dialog box).
               The Step and Repeat dialog box makes a defined number of copies, spaced according to
               the defined Offset values. By default, these values are set to the last-used movement that
               you applied in the layout. As you can see, the 50 copies (the original 5 and the 45 that
               will from the Step and Repeat process) are all equally spaced. Depending on the spacing
               between the first five objects, they might not extend far enough to fill the filmstrip or   Note:
               they might extend past the edge of the filmstrip .
                                                                                        For the dialog box
                                                                                        Preview option to work
                                                                                        properly, you have to
                                                                                        move the highlight
                                                                                        away from the field you
                                                                                        changed. Pressing Tab
                                                                                        while the dialog box is
                                                                                        open allows you to see the
                                                                                        results of your changes.

           11.  Click OK to make the copies, then click away from the resulting shapes to
               deselect them.

           12.  Zoom in to the right end of the black rectangle, and select only the right-
               most rounded rectangle.
           13.  Press Shift, then drag horizontally until the center of the object snaps to the
               bleed guide.
               Pressing Shift while dragging constrains the movement to 45° angles. As you drag, the
               bleed guide acts as a magnet, so the object’s center point snaps to that guide.
               Make sure all the rounded rectangles are within the boundaries of the black shape. If any
               other shapes are still to the right of the black shape, use the Shift-drag method to move
               them horizontally until they are all left of the one aligned to the bleed guide.


           14.  Zoom out so you can see the entire page width, then choose Edit>Select All.

           15.  Press Shift and click the black rectangle to deselect only that object.
               When you are working with a large number of objects, it is often easier to deselect what
               you don’t want than to select the ones you do want. Steps 14 and 15 show a very easy
               way to select most, but not all, of the objects on a page.


                           Shift-clicking a selected object   All of the rounded
                         removes it from the active selection.  rectangles are still selected.


       42 Project 1: Letterhead Design

