


Page 29 - CC2017_ID_Look_Inside
P. 29
5.  Click once inide the area of the black rectangle to open the Rectangle
                   dialog box.

                   Single-clicking with a shape tool opens a dialog box where you can define specific
                   measurements for the new shape.

                6.  In the Rectangle dialog box, set the Width to 0.125 in and the Height to
                   0.08 in, and then click OK.


                   The new rectangle is placed with the selected reference point where you clicked.

                7.  Zoom in so you can more clearly see the small rectangle you just created.
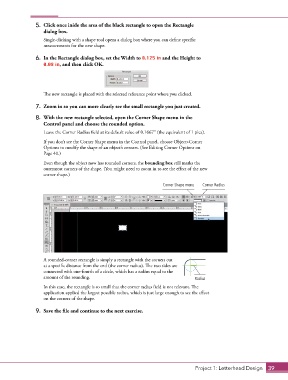
                8.  With the new rectangle selected, open the Corner Shape menu in the
                   Control panel and choose the rounded option.
                   Leave the Corner Radius field at its default value of 0.1667″ (the equivalent of 1 pica).

                   If you don’t see the Corner Shape menu in the Control panel, choose Object>Corner
                   Options to modify the shape of an object’s corners. (See Editing Corner Options on
                   Page 40.)
                   Even though the object now has rounded corners, the bounding box still marks the
                   outermost corners of the shape. (You might need to zoom in to see the effect of the new
                   corner shape.)

                                                                    Corner Shape menu  Corner Radius


                   A rounded-corner rectangle is simply a rectangle with the corners cut
                   at a specific distance from the end (the corner radius). The two sides are
                   connected with one-fourth of a circle, which has a radius equal to the
                   amount of the rounding.                                       Radius
                   In this case, the rectangle is so small that the corner radius field is not relevant. The
                   application applied the largest possible radius, which is just large enough to see the effect
                   on the corners of the shape.

                9.  Save the file and continue to the next exercise.


                                                                                  Project 1: Letterhead Design  39

