


Page 22 - CC2017_ID_Look_Inside
P. 22
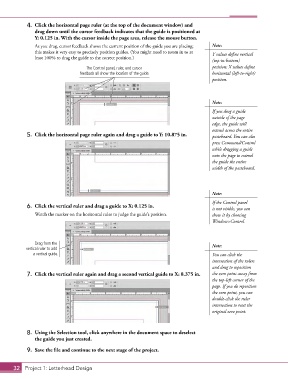
4.  Click the horizontal page ruler (at the top of the document window) and
               drag down until the cursor feedback indicates that the guide is positioned at
               Y: 0.125 in. With the cursor inside the page area, release the mouse button.
               As you drag, cursor feedback shows the current position of the guide you are placing;   Note:
               this makes it very easy to precisely position guides. (You might need to zoom in to at   Y values define vertical
               least 100% to drag the guide to the correct position.)
                                                                                         (top-to-bottom)
                                     The Control panel, ruler, and cursor                position; X values define
                                  feedback all show the location of the guide.           horizontal (left-to-right)
                                                                                         position.


                                                                                         Note:
                                                                                         If you drag a guide
                                                                                         outside of the page
                                                                                         edge, the guide will
                                                                                         extend across the entire
            5.  Click the horizontal page ruler again and drag a guide to Y: 10.875 in.   pasteboard. You can also
                                                                                         press Command/Control
                                                                                         while dragging a guide
                                                                                         onto the page to extend
                                                                                         the guide the entire
                                                                                         width of the pasteboard.


                                                                                         Note:
                                                                                         If the Control panel
            6.  Click the vertical ruler and drag a guide to X: 0.125 in.                is not visible, you can
               Watch the marker on the horizontal ruler to judge the guide’s position.   show it by choosing
                                                                                         Window>Control.


               Drag from the                                                             Note:
            vertical ruler to add
               a vertical guide.                                                         You can click the
                                                                                         intersection of the rulers
                                                                                         and drag to reposition
            7.  Click the vertical ruler again and drag a second vertical guide to X: 8.375 in.  the zero point away from
                                                                                         the top-left corner of the
                                                                                         page. If you do reposition
                                                                                         the zero point, you can
                                                                                         double-click the ruler
                                                                                         intersection to reset the
                                                                                         original zero point.


            8.  Using the Selection tool, click anywhere in the document space to deselect
               the guide you just created.

            9.  Save the file and continue to the next stage of the project.


       32 Project 1: Letterhead Design

