


Page 41 - CC2017_WD_Look_Inside
P. 41
11.  Click the Commit Transform button on the Options bar or press Return/
                   Enter to apply the transformation.

               12.  Choose Edit>Transform>Scale again and look at the Options bar.
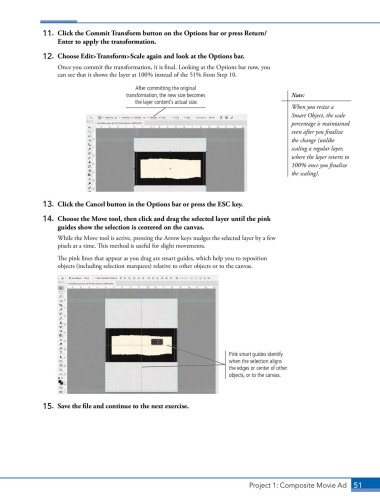
                   Once you commit the transformation, it is final. Looking at the Options bar now, you
                   can see that it shows the layer at 100% instead of the 51% from Step 10.
                                           After committing the original
                                        transformation, the new size becomes                Note:
                                           the layer content’s actual size.
                                                                                            When you resize a
                                                                                            Smart Object, the scale
                                                                                            percentage is maintained
                                                                                            even after you finalize
                                                                                            the change (unlike
                                                                                            scaling a regular layer,
                                                                                            where the layer reverts to
                                                                                            100% once you finalize
                                                                                            the scaling).


               13.  Click the Cancel button in the Options bar or press the ESC key.

               14.  Choose the Move tool, then click and drag the selected layer until the pink
                   guides show the selection is centered on the canvas.
                   While the Move tool is active, pressing the Arrow keys nudges the selected layer by a few
                   pixels at a time. This method is useful for slight movements.

                   The pink lines that appear as you drag are smart guides, which help you to reposition
                   objects (including selection marquees) relative to other objects or to the canvas.


                                                                         Pink smart guides identify
                                                                         when the selection aligns
                                                                         the edges or center of other
                                                                         objects, or to the canvas.


               15.  Save the file and continue to the next exercise.


                                                                               Project 1: Composite Movie Ad    51

