


Page 34 - CC2017_WD_Look_Inside
P. 34
plACe veCtor grAphiCs As smArt objeCt lAyers
          As you have seen in the last few exercises, copying layer content from one file to
          another results in new regular layers for the pasted content. Photoshop also supports
          Smart Object layers, in which you place one file into another instead of pasting layer
          content. Smart Objects provide a number of advantages over regular layers, which you
          will explore later in this project. In this exercise, you will create the Smart Object layers
          for the remaining image elements.
              Vector graphics offer several advantages over raster images, including sharper
          edges and free scaling without deteriorating image quality. To take advantage of these
          benefits, you might want to maintain vector files as vector objects instead of rasterizing
          them. Photoshop gives you the option to do exactly that — maintaining vector
          information and raster information in the same file.
            1.  With forefathers.psd open, choose File>Place Embedded.
               Two options in the File menu — Place Embedded and Place Linked — give you the
               option to embed the placed file data into active file, or to place smart objects as links to
               the original placed file. (See Page 46 for more about placing linked files.)   Note:
               The Place Embedded dialog box is virtually the same as the Open dialog box. You can   You can place either
               use this function any time you want to place one entire file directly into another without   raster or vector files as
               dragging or copying and pasting (as you did in the previous exercises).  Smart Objects. If you
                                                                                        place a raster file as a
            2.  Navigate to and select rated-r-white.ai and click Place.                Smart Object, double-
                                                                                        clicking the thumbnail
            3.  In the resulting Place PDF dialog box, choose Art Box in the Crop To menu   opens the placed raster
               and then click OK.                                                       file in another Photoshop
               The Crop To options in this dialog box are the same as those that are available when you   window.
               rasterize a native Illustrator file.


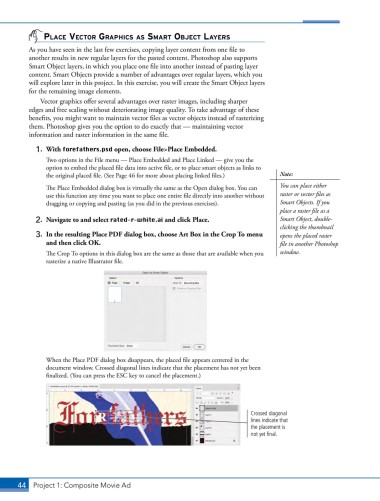
               When the Place PDF dialog box disappears, the placed file appears centered in the
               document window. Crossed diagonal lines indicate that the placement has not yet been
               finalized. (You can press the ESC key to cancel the placement.)


                                                                               Crossed diagonal
                                                                               lines indicate that
                                                                               the placement is
                                                                               not yet final.


       44 Project 1: Composite Movie Ad

