
Page 21 - Adobe Photoshop CC 2020
P. 21
16. Choose Photoshop in the Format/Save As Type menu and then click Save.
You can save a Photoshop
file in a number of different
formats, all of which
have specific capabilities, Files saved in the native
limitations, and purposes. Photoshop format display
a “.psd” extension.
While you are still working
on a file, it’s best to keep it
as a native Photoshop (PSD)
file. When you choose a
different format, the correct
extension is automatically
added to the file name.
17. Continue to the next
exercise.
Crop the Canvas and Place Ruler Guides
The final step in preparing the workspace is defining the live area of the page. Trim
size is the actual size of a page once it has been cut out of the press sheet. According Note:
to your client, the final required artwork has a trim size of 10″ × 10″.
Any elements that print right to the edge of a page (called bleeding) must actually You should familiarize
extend beyond the defined trim size. The bleed allowance is the amount of extra space yourself with the most
that should be included for these bleed objects. Most applications require at least a common fraction-to-
1/8″ bleed allowance on any bleed edge. decimal equivalents:
Because of inherent variation in the mechanical printing and trimming 1/8 = 0.125
processes, most printing projects also define a safe or live area. All important design 1/4 = 0.25
elements — especially text — should stay within this live area. The live area for this
project is 9.5″ × 9.5″ (leaving a 0.25″ safe margin on each edge of the artwork). 3/8 = 0.375
1/2 = 0.5
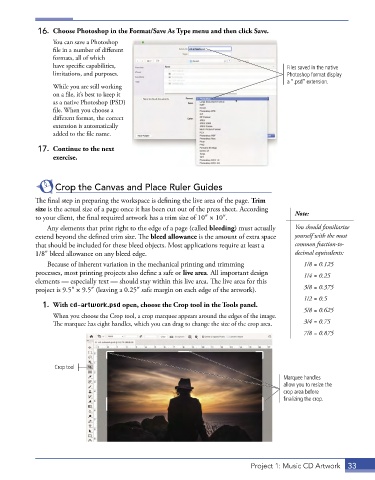
1. With cd-artwork.psd open, choose the Crop tool in the Tools panel.
5/8 = 0.625
When you choose the Crop tool, a crop marquee appears around the edges of the image.
The marquee has eight handles, which you can drag to change the size of the crop area. 3/4 = 0.75
7/8 = 0.875
Crop tool
Marquee handles
allow you to resize the
crop area before
finalizing the crop.
Project 1: Music CD Artwork 33