


Page 66 - CS6_ID_Look_Inside
P. 66
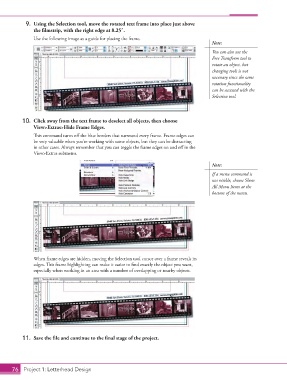
9.  Using the Selection tool, move the rotated text frame into place just above
                    the filmstrip, with the right edge at 8.25″.
                    Use the following image as a guide for placing the frame.
                                                                                             Note:
                                                                                             You can also use the
                                                                                             Free Transform tool to
                                                                                             rotate an object, but
                                                                                             changing tools is not
                                                                                             necessary since the same
                                                                                             rotation functionality
                                                                                             can be accessed with the
                                                                                             Selection tool.


                10.  Click away from the text frame to deselect all objects, then choose
                    View>Extras>Hide Frame Edges.
                    This command turns off the blue borders that surround every frame. Frame edges can
                    be very valuable when you’re working with some objects, but they can be distracting
                    in other cases. Always remember that you can toggle the frame edges on and off in the
                    View>Extras submenu.

                                                                                             Note:
                                                                                             If a menu command is
                                                                                             not visible, choose Show
                                                                                             All Menu Items at the
                                                                                             bottom of the menu.


                    When frame edges are hidden, moving the Selection tool cursor over a frame reveals its
                    edges. This frame highlighting can make it easier to find exactly the object you want,
                    especially when working in an area with a number of overlapping or nearby objects.


                11.  Save the file and continue to the final stage of the project.


           76 Project 1: Letterhead Design

