


Page 52 - CC2017_ID_Look_Inside
P. 52
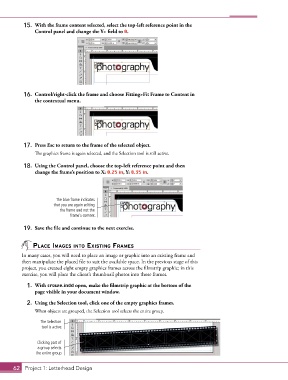
15.  With the frame content selected, select the top-left reference point in the
               Control panel and change the Y+ field to 0.


           16.  Control/right-click the frame and choose Fitting>Fit Frame to Content in
               the contextual menu.


           17.  Press Esc to return to the frame of the selected object.

               The graphics frame is again selected, and the Selection tool is still active.

           18.  Using the Control panel, choose the top-left reference point and then
               change the frame’s position to X: 0.25 in, Y: 0.35 in.


                        The blue frame indicates
                       that you are again editing
                          the frame and not the
                              frame’s content.

           19.  Save the file and continue to the next exercise.


               PlACe imAges into existing FrAmes
          In many cases, you will need to place an image or graphic into an existing frame and
          then manipulate the placed file to suit the available space. In the previous stage of this
          project, you created eight empty graphics frames across the filmstrip graphic; in this
          exercise, you will place the client’s thumbnail photos into those frames.

            1.  With crowe.indd open, make the filmstrip graphic at the bottom of the
               page visible in your document window.

            2.  Using the Selection tool, click one of the empty graphics frames.
               When objects are grouped, the Selection tool selects the entire group.

                  The Selection
                  tool is active.


                Clicking part of
                 a group selects
                the entire group.


       62 Project 1: Letterhead Design

