


Page 40 - CC2017_ID_Look_Inside
P. 40
5.  At the left end of the Control panel, change the Y field to 1″ and press
               Return/Enter to apply the change.                                        Note:

               Changing the Y value moves the selected element up or down. Because you constrained   Remember, you do not
               this line to horizontal, changing the Y field moves the entire line.     need to type the units
                                                                                        if you are entering
                                                                                        a measurement in
                                                                                        the default unit of
                                                                                        measurement. We include
                                                                                        the units in our steps for
                                                                                        the sake of clarity.


            6.  Choose the Pen tool in the Tools panel.

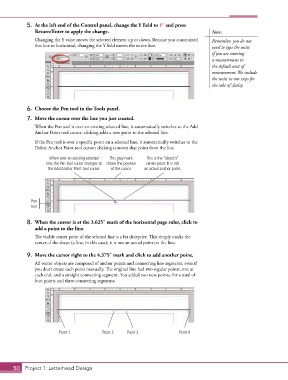
            7.  Move the cursor over the line you just created.
               When the Pen tool is over an existing selected line, it automatically switches to the Add
               Anchor Point tool cursor; clicking adds a new point to the selected line.

               If the Pen tool is over a specific point on a selected line, it automatically switches to the
               Delete Anchor Point tool cursor; clicking removes that point from the line.

                     When over an existing selected   This gray mark   This is the “object’s”
                    line, the Pen tool cursor changes to  shows the position   center point. It is not
                     the Add Anchor Point tool cursor.  of the cursor.  an actual anchor point.


              Pen
              tool


            8.  When the cursor is at the 3.625″ mark of the horizontal page ruler, click to
               add a point to the line.
               The visible center point of the selected line is a bit deceptive. This simply marks the
               center of the shape (a line, in this case); it is not an actual point on the line.

            9.  Move the cursor right to the 4.375″ mark and click to add another point.
               All vector objects are composed of anchor points and connecting line segments, even if
               you don’t create each point manually. The original line had two regular points, one at
               each end, and a straight connecting segment. You added two new points, for a total of
               four points and three connecting segments.


                         Point 1           Point 2    Point 3              Point 4


       50 Project 1: Letterhead Design

