


Page 55 - CS6_AI_Look_Inside.pdf
P. 55
12.  Using the Selection tool, draw a marquee around the three objects that you
                        have created to select them all. Use the options in the Align or Control panel
                        to align the selected objects horizontally and vertically.


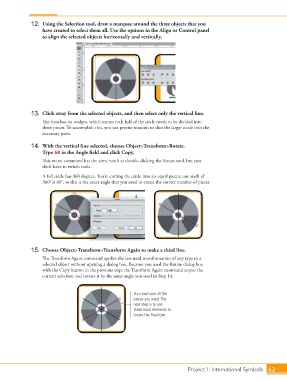
                   13.  Click away from the selected objects, and then select only the vertical line.
                        The icon has six wedges, which means each half of the circle needs to be divided into
                        three pieces. To accomplish this, you use precise rotation to slice the larger circle into the
                        necessary parts.

                   14.  With the vertical line selected, choose Object>Transform>Rotate.
                        Type 60 in the Angle field and click Copy.
                        This menu command has the same result as double-clicking the Rotate tool, but you
                        don’t have to switch tools.

                        A full circle has 360 degrees. You’re cutting the circle into six equal pieces; one sixth of
                        360° is 60°, so this is the exact angle that you need to create the correct number of pieces.


                   15.  Choose Object>Transform>Transform Again to make a third line.

                        The Transform Again command applies the last-used transformation of any type to a
                        selected object without opening a dialog box. Because you used the Rotate dialog box
                        with the Copy button in the previous step, the Transform Again command copies the
                        current selection and rotates it by the same angle you used in Step 14.


                                                             You now have all the
                                                             pieces you need. The
                                                             next step is to use
                                                             these basic elements to
                                                             create the final icon.


                                                                                   Project 1: International Symbols  63

