


Page 66 - CC2018_AI_Look_Inside
P. 66
14.  Use what you learned in previous exercises to create a locked group named
               Campfire for the final icon artwork.

               In this case you do not need to create a separate group for the icon because it is already
               combined in the Compound Path object.


           15.  Save the file and continue to the final exercise.


               EdIt IndIvIdual groupEd ElEmEnts
          The client has decided that the icons should be white artwork on green backgrounds,
          so the final step in this exercise requires changing the colors of both the background
          shapes and the icon artwork. This is a fairly easy process, but because each of the icons
          are grouped, it will require a few extra steps.

            1.  With icons.ai open, change your view percentage so you can see all the
               artwork in the file.
            2.  In the Layers panel, unlock all layers and sublayers in the file.

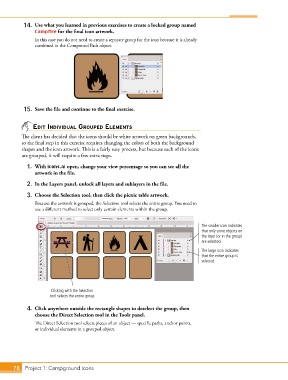
            3.  Choose the Selection tool, then click the picnic table artwork.

               Because the artwork is grouped, the Selection tool selects the entire group. You need to
               use a different method to select only certain elements within the group.


                                                                                    The smaller icon indicates
                                                                                    that only some objects on
                                                                                    the layer (or in the group)
                                                                                    are selected.
                                                                                    The large icon indicates
                                                                                    that the entire group is
                                                                                    selected.


                      Clicking with the Selection
                      tool selects the entire group.

            4.  Click anywhere outside the rectangle shapes to deselect the group, then
               choose the Direct Selection tool in the Tools panel.
               The Direct Selection tool selects pieces of an object — specific paths, anchor points,
               or individual elements in a grouped object.


       78 Project 1: Campground Icons

