
Page 36 - Demo
P. 36
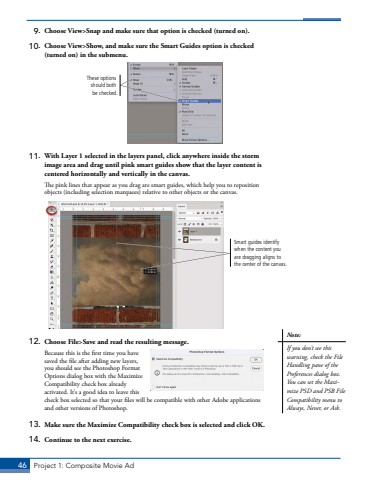
46 Project 1: Composite Movie Ad9. Choose View>Snap and make sure that option is checked (turned on).10. Choose View>Show, and make sure the Smart Guides option is checked (turned on) in the submenu.These options should both be checked.11. With Layer 1 selected in the layers panel, click anywhere inside the storm image area and drag until pink smart guides show that the layer content is centered horizontally and vertically in the canvas.The pink lines that appear as you drag are smart guides, which help you to reposition objects (including selection marquees) relative to other objects or the canvas.Smart guides identify when the content you are dragging aligns to the center of the canvas.12. Choose File>Save and read the resulting message.Because this is the first time you have saved the file after adding new layers, you should see the Photoshop Format Options dialog box with the Maximize Compatibility check box already activated. It%u2019s a good idea to leave this check box selected so that your files will be compatible with other Adobe applications and other versions of Photoshop.13. Make sure the Maximize Compatibility check box is selected and click OK. 14. Continue to the next exercise.Note:If you don%u2019t see this warning, check the File Handling pane of the Preferences dialog box. You can set the Maximize PSD and PSB File Compatibility menu to Always, Never, or Ask.
