


Page 43 - CS6_ID_Look_Inside
P. 43
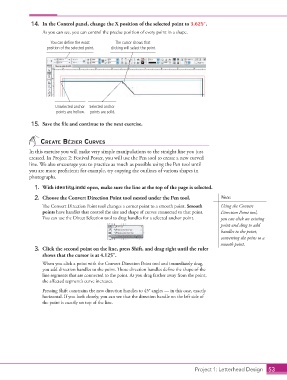
14.  In the Control panel, change the X position of the selected point to 3.625″.
                        As you can see, you can control the precise position of every point in a shape.

                           You can define the exact   The cursor shows that
                          position of the selected point.  clicking will select the point.


                             Unselected anchor   Selected anchor
                             points are hollow.  points are solid.

                   15.  Save the file and continue to the next exercise.


                       create Bézier curves
                  In this exercise you will make very simple manipulations to the straight line you just
                  created. In Project 2: Festival Poster, you will use the Pen tool to create a new curved
                  line. We also encourage you to practice as much as possible using the Pen tool until
                  you are more proficient; for example, try copying the outlines of various shapes in
                  photographs.
                    1.  With identity.indd open, make sure the line at the top of the page is selected.

                    2.  Choose the Convert Direction Point tool nested under the Pen tool.       Note:
                        The Convert Direction Point tool changes a corner point to a smooth point. Smooth   Using the Convert
                        points have handles that control the size and shape of curves connected to that point.   Direction Point tool,
                        You can use the Direct Selection tool to drag handles for a selected anchor point.  you can click an existing
                                                                                                 point and drag to add
                                                                                                 handles to the point,
                                                                                                 converting the point to a
                                                                                                 smooth point.
                    3.  Click the second point on the line, press Shift, and drag right until the ruler
                        shows that the cursor is at 4.125″.
                        When you click a point with the Convert Direction Point tool and immediately drag,
                        you add direction handles to the point. Those direction handles define the shape of the
                        line segments that are connected to the point. As you drag farther away from the point,
                        the affected segment’s curve increases.

                        Pressing Shift constrains the new direction handles to 45° angles — in this case, exactly
                        horizontal. If you look closely, you can see that the direction handle on the left side of
                        the point is exactly on top of the line.


                                                                                      Project 1: Letterhead Design  53

