


Page 57 - CC2018_ID_Look_Inside
P. 57
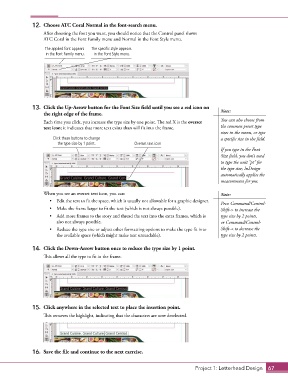
12.  Choose ATC Coral Normal in the font-search menu.
                   After choosing the font you want, you should notice that the Control panel shows
                   ATC Coral in the Font Family menu and Normal in the Font Style menu.

                    The applied font appears   The specific style appears
                    in the Font Family menu.  in the Font Style menu.


               13.  Click the Up-Arrow button for the Font Size field until you see a red icon on   Note:
                   the right edge of the frame.

                   Each time you click, you increase the type size by one point. The red X is the overset   You can also choose from
                   text icon; it indicates that more text exists than will fit into the frame.  the common preset type
                                                                                            sizes in the menu, or type
                       Click these buttons to change                                        a specific size in the field.
                         the type size by 1 point.       Overset text icon
                                                                                            If you type in the Font
                                                                                            Size field, you don’t need
                                                                                            to type the unit “pt” for
                                                                                            the type size; InDesign
                                                                                            automatically applies the
                                                                                            measurement for you.

                   When you see an overset text icon, you can:                              Note:
                      •  Edit the text to fit the space, which is usually not allowable for a graphic designer.
                                                                                            Press Command/Control-
                      •  Make the frame larger to fit the text (which is not always possible).  Shift-> to increase the
                      •  Add more frames to the story and thread the text into the extra frames, which is   type size by 2 points,
                        also not always possible.                                           or Command/Control-
                      •  Reduce the type size or adjust other formatting options to make the type fit into   Shift-< to decrease the
                        the available space (which might make text unreadable).             type size by 2 points.

               14.  Click the Down-Arrow button once to reduce the type size by 1 point.
                   This allows all the type to fit in the frame.


               15.  Click anywhere in the selected text to place the insertion point.
                   This removes the highlight, indicating that the characters are now deselected.


               16.  Save the file and continue to the next exercise.


                                                                                  Project 1: Letterhead Design  67

