
Page 52 - Adobe InDesign 2021
P. 52
Place Images into Existing Frames
In many cases, you will need to place an image or graphic into an existing frame and
then manipulate the placed file to suit the available space. In the previous stage of
this project, you created five empty graphics frames at the bottom of the layout; in
this exercise, you will place the client’s photos into those frames.
1. With gcm-letterhead.indd open, make the bottom of the page visible in
your document window.
2. Using the Selection tool, click one of the empty graphics frames.
Remember, when objects are grouped, the Selection tool selects the entire group.
The Selection
tool is active.
Clicking part of
a group selects
the entire group.
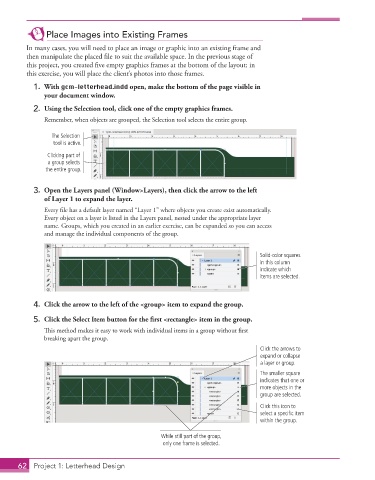
3. Open the Layers panel (Window>Layers), then click the arrow to the left
of Layer 1 to expand the layer.
Every file has a default layer named “Layer 1” where objects you create exist automatically.
Every object on a layer is listed in the Layers panel, nested under the appropriate layer
name. Groups, which you created in an earlier exercise, can be expanded so you can access
and manage the individual components of the group.
Solid-color squares
in this column
indicate which
items are selected.
4. Click the arrow to the left of the <group> item to expand the group.
5. Click the Select Item button for the first <rectangle> item in the group.
This method makes it easy to work with individual items in a group without first
breaking apart the group.
Click the arrows to
expand or collapse
a layer or group.
The smaller square
indicates that one or
more objects in the
group are selected.
Click this icon to
select a specific item
within the group.
While still part of the group,
only one frame is selected.
62 Project 1: Letterhead Design