
Page 49 - Adobe InDesign 2021
P. 49
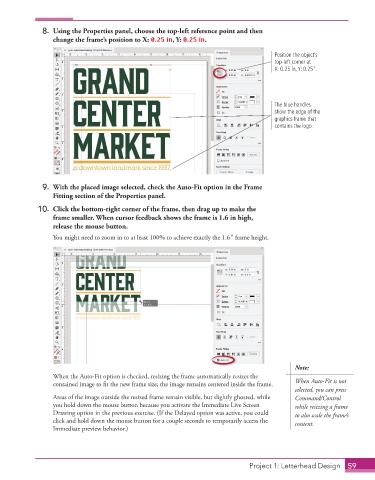
8.  Using the Properties panel, choose the top-left reference point and then
                 change the frame’s position to X: 0.25 in, Y: 0.25 in.

                                                                                     Position the object’s
                                                                                     top-left corner at
                                                                                     X: 0.25 in, Y: 0.25”.


                                                                                     The blue handles
                                                                                     show the edge of the
                                                                                     graphics frame that
                                                                                     contains the logo.


             9.  With the placed image selected, check the Auto-Fit option in the Frame
                 Fitting section of the Properties panel.

             10.  Click the bottom-right corner of the frame, then drag up to make the
                 frame smaller. When cursor feedback shows the frame is 1.6 in high,
                 release the mouse button.
                 You might need to zoom in to at least 100% to achieve exactly the 1.6″ frame height.


                                                                                           Note:
                 When the Auto-Fit option is checked, resizing the frame automatically resizes the
                 contained image to fit the new frame size; the image remains centered inside the frame.   When Auto-Fit is not

                                                                                           selected, you can press
                 Areas of the image outside the resized frame remain visible, but slightly ghosted, while   Command/Control
                 you hold down the mouse button because you activate the Immediate Live Screen   while resizing a frame
                 Drawing option in the previous exercise. (If the Delayed option was active, you could   to also scale the frame’s
                 click and hold down the mouse button for a couple seconds to temporarily access the   content.
                 Immediate preview behavior.)


                                                                             Project 1: Letterhead Design  59