


Page 41 - Adobe Indesign CC 2020
P. 41
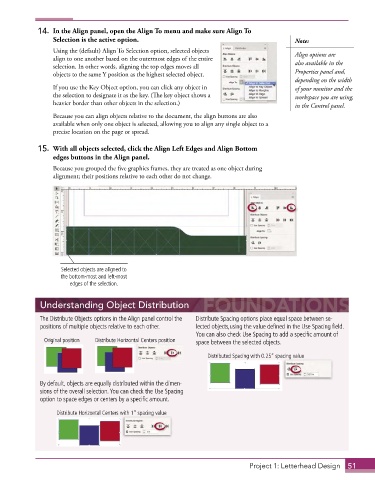
14.  In the Align panel, open the Align To menu and make sure Align To
                 Selection is the active option.                                           Note:
                 Using the (default) Align To Selection option, selected objects           Align options are
                 align to one another based on the outermost edges of the entire
                 selection. In other words, aligning the top edges moves all               also available in the
                 objects to the same Y position as the highest selected object.            Properties panel and,
                                                                                           depending on the width
                 If you use the Key Object option, you can click any object in             of your monitor and the
                 the selection to designate it as the key. (The key object shows a         workspace you are using,
                 heavier border than other objects in the selection.)                      in the Control panel.
                 Because you can align objects relative to the document, the align buttons are also
                 available when only one object is selected, allowing you to align any single object to a
                 precise location on the page or spread.


             15.  With all objects selected, click the Align Left Edges and Align Bottom
                 edges buttons in the Align panel.
                 Because you grouped the five graphics frames, they are treated as one object during
                 alignment; their positions relative to each other do not change.


                    Selected objects are aligned to
                    the bottom-most and left-most
                      edges of the selection.


             Understanding Object Distribution

             The Distribute Objects options in the Align panel control the   Distribute Spacing options place equal space between se-
             positions of multiple objects relative to each other .   lected objects,using the value defined in the Use Spacing field .
                                                             You can also check Use Spacing to add a specific amount of
               Original position  Distribute Horizontal Centers position  space between the selected objects .

                                                                Distributed Spacing with 0.25” spacing value


             By default, objects are equally distributed within the dimen-
             sions of the overall selection . You can check the Use Spacing
             option to space edges or centers by a specific amount .

                  Distribute Horizontal Centers with 1” spacing value


                                                                             Project 1: Letterhead Design  51

