


Page 36 - Adobe Indesign CC 2020
P. 36
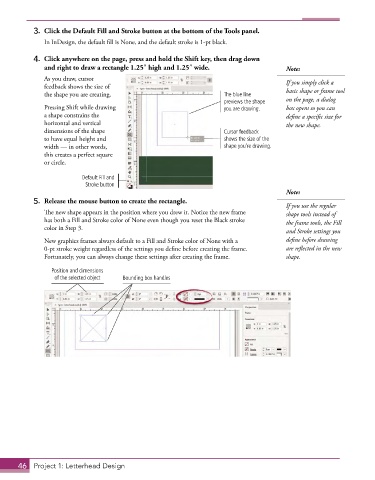
3.  Click the Default Fill and Stroke button at the bottom of the Tools panel.
               In InDesign, the default fill is None, and the default stroke is 1-pt black.

           4.  Click anywhere on the page, press and hold the Shift key, then drag down
              and right to draw a rectangle 1.25″ high and 1.25″ wide.                  Note:
               As you draw, cursor                                                      If you simply click a
               feedback shows the size of
               the shape you are creating.                           The blue line      basic shape or frame tool
                                                                     previews the shape   on the page, a dialog
               Pressing Shift while drawing                          you are drawing.   box opens so you can
               a shape constrains the                                                   define a specific size for
               horizontal and vertical                                                  the new shape.
               dimensions of the shape                               Cursor feedback
               to have equal height and                              shows the size of the
               width — in other words,                               shape you’re drawing.
               this creates a perfect square
               or circle.

                          Default Fill and
                           Stroke button
                                                                                        Note:
           5.  Release the mouse button to create the rectangle.
                                                                                        If you use the regular
               The new shape appears in the position where you drew it. Notice the new frame    shape tools instead of
               has both a Fill and Stroke color of None even though you reset the Black stroke    the frame tools, the Fill
               color in Step 3.
                                                                                        and Stroke settings you
               New graphics frames always default to a Fill and Stroke color of None with a   define before drawing
               0-pt stroke weight regardless of the settings you define before creating the frame.   are reflected in the new
               Fortunately, you can always change these settings after creating the frame.  shape.

                 Position and dimensions
                  of the selected object  Bounding box handles


       46  Project 1: Letterhead Design

