


Page 25 - CS6_AI_Look_Inside.pdf
P. 25
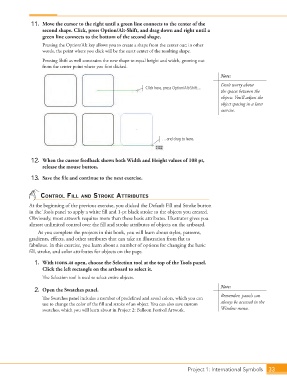
11.  Move the cursor to the right until a green line connects to the center of the
                        second shape. Click, press Option/Alt-Shift, and drag down and right until a
                        green line connects to the bottom of the second shape.
                        Pressing the Option/Alt key allows you to create a shape from the center out; in other
                        words, the point where you click will be the exact center of the resulting shape.
                        Pressing Shift as well constrains the new shape to equal height and width, growing out
                        from the center point where you first clicked.
                                                                                                 Note:
                                                                                                 Don’t worry about
                                                                  Click here, press Option/Alt-Shift…
                                                                                                 the spaces between the
                                                                                                 objects. You’ll adjust the
                                                                                                 object spacing in a later
                                                                                                 exercise.


                                                                         …and drag to here.


                   12.  When the cursor feedback shows both Width and Height values of 108 pt,
                        release the mouse button.

                   13.  Save the file and continue to the next exercise.


                       control Fill and stroke attriButes

                  At the beginning of the previous exercise, you clicked the Default Fill and Stroke button
                  in the Tools panel to apply a white fill and 1-pt black stroke to the objects you created.
                  Obviously, most artwork requires more than these basic attributes. Illustrator gives you
                  almost unlimited control over the fill and stroke attributes of objects on the artboard.
                      As you complete the projects in this book, you will learn about styles, patterns,
                  gradients, effects, and other attributes that can take an illustration from flat to
                  fabulous. In this exercise, you learn about a number of options for changing the basic
                  fill, stroke, and color attributes for objects on the page.

                    1.  With icons.ai open, choose the Selection tool at the top of the Tools panel.
                        Click the left rectangle on the artboard to select it.

                        The Selection tool is used to select entire objects.
                                                                                                 Note:
                    2.  Open the Swatches panel.
                                                                                                 Remember, panels can
                        The Swatches panel includes a number of predefined and saved colors, which you can
                        use to change the color of the fill and stroke of an object. You can also save custom   always be accessed in the
                        swatches, which you will learn about in Project 2: Balloon Festival Artwork.  Window menu.


                                                                                   Project 1: International Symbols  33

