


Page 71 - CC 2019 WD Look Inside
P. 71
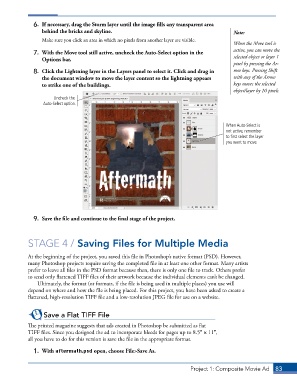
6. If necessary, drag the Storm layer until the image fills any transparent area
behind the bricks and skyline. Note:
Make sure you click an area in which no pixels from another layer are visible.
When the Move tool is
active, you can move the
7. With the Move tool still active, uncheck the Auto-Select option in the selected object or layer 1
Options bar.
pixel by pressing the Ar-
8. Click the Lightning layer in the Layers panel to select it. Click and drag in row keys. Pressing Shift
the document window to move the layer content so the lightning appears with any of the Arrow
to strike one of the buildings. keys moves the selected
object/layer by 10 pixels.
Uncheck the
Auto-Select option.
When Auto-Select is
not active, remember
to first select the layer
you want to move.
9. Save the file and continue to the final stage of the project.
STAGE 4 / Saving Files for Multiple Media
At the beginning of the project, you saved this file in Photoshop’s native format (PSD). However,
many Photoshop projects require saving the completed file in at least one other format. Many artists
prefer to leave all files in the PSD format because then, there is only one file to track. Others prefer
to send only flattened TIFF files of their artwork because the individual elements can’t be changed.
Ultimately, the format (or formats, if the file is being used in multiple places) you use will
depend on where and how the file is being placed. For this project, you have been asked to create a
flattened, high-resolution TIFF file and a low-resolution JPEG file for use on a website.
Save a Flat TIFF File
The printed magazine suggests that ads created in Photoshop be submitted as flat
TIFF files. Since you designed the ad to incorporate bleeds for pages up to 8.5 1 11,
all you have to do for this version is save the file in the appropriate format.
1. With aftermath.psd open, choose File>Save As.
Project 1: Composite Movie Ad 83

