


Page 25 - CC2018_AI_Look_Inside
P. 25
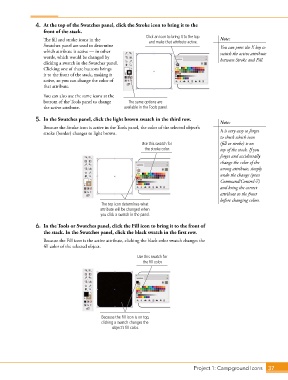
4.  At the top of the Swatches panel, click the Stroke icon to bring it to the
                   front of the stack.
                                                             Click an icon to bring it to the top
                   The fill and stroke icons in the           and make that attribute active.  Note:
                   Swatches panel are used to determine                                     You can press the X key to
                   which attribute is active — in other                                     switch the active attribute
                   words, which would be changed by                                         between Stroke and Fill.
                   clicking a swatch in the Swatches panel.
                   Clicking one of these buttons brings
                   it to the front of the stack, making it
                   active, so you can change the color of
                   that attribute.
                   You can also use the same icons at the
                   bottom of the Tools panel to change   The same options are
                   the active attribute.            available in the Tools panel.

                5.  In the Swatches panel, click the light brown swatch in the third row.
                                                                                            Note:
                   Because the Stroke icon is active in the Tools panel, the color of the selected object’s
                   stroke (border) changes to light brown.                                  It is very easy to forget
                                                                                            to check which icon
                                                            Use this swatch for             (fill or stroke) is on
                                                             the stroke color.              top of the stack. If you
                                                                                            forget and accidentally
                                                                                            change the color of the
                                                                                            wrong attribute, simply
                                                                                            undo the change (press
                                                                                            Command/Control-Z)
                                                                                            and bring the correct
                                                                                            attribute to the front
                                                                                            before changing colors.
                                           The top icon determines what
                                          attribute will be changed when
                                           you click a swatch in the panel.
                6.  In the Tools or Swatches panel, click the Fill icon to bring it to the front of
                   the stack. In the Swatches panel, click the black swatch in the first row.
                   Because the Fill icon is the active attribute, clicking the black color swatch changes the
                   fill color of the selected object.
                                                          Use this swatch for
                                                            the fill color.


                                           Because the Fill icon is on top,
                                           clicking a swatch changes the
                                               object’s fill color.


                                                                                 Project 1: Campground Icons    37

