
Page 5 - Web Combo 2022
P. 5
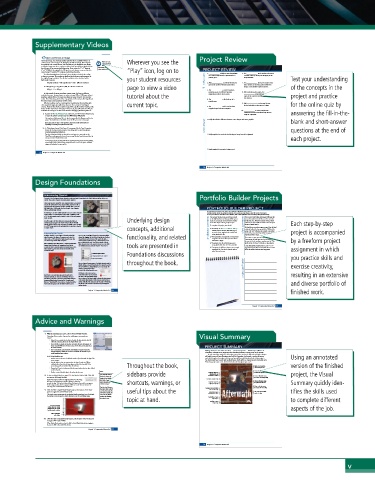
Supplementary Videos

               Open and Resize an Image                       Project Review
              Every raster image has a defined, specific resolution that is established when it is   Wherever you see the
              created. If you scan an image to be 3″ high by 3″ wide at 150 ppi, that image has   Watch the video
              450 pixels in each vertical column, and 450 pixels in each horizontal row. Simply   Understanding
                                Resolution in
              resizing the image stretches or compresses those pixels into a different physical space,   Photoshop in your
              but does not add or remove pixel information. If you resize the 3″ × 3″ image to   online student resources.  PROJECT REVIEW
              6″ × 6″ (200% of the original), the 450 pixels in each column or row are forced to   “Play” icon, log on to
              extend across 6″ instead of 3″, causing a marked loss of quality.
              The effective resolution of an image is the resolution calculated after scaling      1. _______________ is likely to cause degradation     6. The _______________ tool is used to select areas
              is taken into account. This number is equally as (and perhaps, more) important as   of a raster image when it’s reproduced on a   of similar color by clicking and dragging in the
              the original image resolution. The effective resolution can be calculated with a    your student resources   printing press.  image window.   Test your understanding
              fairly simple equation:                          fill in the blank
               Original resolution ÷ (% magnification ÷ 100) = Effective resolution    2. A(n) _______________ is a linked file that you     7. The _______________ tool can be used to drag
              If a 300-ppi image is magnified 150%, the effective resolution is:  page to view a video   placed into another Photoshop document.  layer contents to another position within the   of the concepts in the
                                                                           image, or into another open document.
               300 ppi ÷ 1.5 = 200 ppi                            3. The _______________ is context sensitive,
                                                                 providing access to different functions     8. When selecting color ranges, the
              In other words, the more you enlarge a raster image, the lower its effective   depending on which tool is active.  _______________ value determines how
              resolution becomes. In general, you can make an image 10% or 15% larger without   tutorial about the   much of the current color range falls into    project and practice
              significant adverse effects. The more you enlarge an image, however, the worse the
              results. Even Photoshop, which offers very sophisticated formulas (called algorithms)     4. The _______________ is the final size of a   the selection.
              for sizing images, cannot guarantee perfect results.  printed page.
              Effective resolution can be a very important consideration when working with   current topic.    9. A(n) _______________ can be used to non-  for the online quiz by
              client-supplied images, especially those that come from consumer-level digital   destructively hide certain areas of a layer.
              cameras. Many of those devices capture images with a specific number of pixels, rather     5. The _______________ tool is used to draw
              than a number of pixels per inch (ppi). In this exercise, you will explore the effective   irregular-shaped selection marquees.
              resolution of an image to see if it can be used for a full-page, printed magazine ad.   10. _______________ is a lossy compression
                                                                           method that is best used when large file size   answering the fill-in-the-
                1.  Expand the Movie_Web22_RF.zip archive in your WIP folder (Macintosh),    might be a problem.
               or copy the archive contents into your WIP folder (Windows).
               This results in a folder named Movie, which contains all of the files you need for this
               project. You should also use this folder to save the files you create in this project.    1. Briefly describe the difference between raster images and vector graphics.   blank and short-answer
               If necessary, refer to Page 1 of the Interface chapter for specific information on
               expanding or accessing the required resource files.  short answer
                2.  In Photoshop, choose File>Open. If necessary, click the Your Computer
               button in the bottom-left corner of the dialog box to show the system-     questions at the end of
               standard navigation dialog box.
               The Open dialog box defaults to show the last-used option, so you might see the     2. Briefly explain three methods for isolating an image from its background.
               Cloud Documents pane, which is used to access any files that have been saved directly
               into your Creative Cloud (CC) account.                                     each project.
               In this project you are working with files on your local computer (or other local drive),
               so you might need to click the Your Computer button to access the system-standard
               navigation dialog box for opening files.
                                                                  3. Briefly explain the concept of a layer mask.
             28  Project 1: Composite Movie Ad
                                                               92  Project 1: Composite Movie Ad
            Design Foundations
               Understanding Channels                         Portfolio Builder Projects
               You need a bit of background about channels to understand what’s happening in the Quick Mask you will use in the next
               exercise. (You will use channels extensively in later projects.)
               Every image has one channel for each component color. Each channel
               contains the information for the amount of that component color in
               any given pixel. An RGB image has three channels: Red, Green, and
               Blue (right top). A CMYK image has four channels: Cyan, Magenta,   PORTFOLIO BUILDER PROJECT
               Yellow, and Black (right bottom).                Use what you have learned in this project to complete the following freeform exercise.
               In RGB images, the three additive primaries can have a value of 0 (none   Carefully read the art director and client comments, then create your own design to meet the needs of the project.
               of that color) to 255 (full intensity of that color). Combining a value   Use the space below to sketch ideas. When finished, write a brief explanation of the reasoning behind your final design.
               of 255 for each primary results in white. A value of 0 for each primary   Tantamount Studios is pleased with your work     The movie is titled Above and Beyond. Although the
               results in black.        Underlying design        on the Aftermath ad, and they would like you to   story is fictionalized, it will focus on the men who
               In CMYK images, the three subtractive primaries plus black are   create the ad concept and final files for another   led the first U.S. Airborne unit (the 501st), which
               combined in percentages from 0 (none of that color) to 100 (full   movie that they’re releasing early next year.   suffered more than 2,000 casualties in the European   Each step-by-step
               intensity of that color) to create the range of printable colors. Channels   To complete this project, you should:  client comments  theater of World War II.
               in a CMYK image represent the printing plates or separations required
               to output the job.       concepts, additional     art director comments  o  Download the Airborne_Web22_PB.zip     We don’t have any other images in mind, but the final
                                                                            ad should reflect the time period (the 1940s) of the
                                                                  archive from the Student Files web page to
                                                                            into battle, so you should probably incorporate some
               Understanding Alpha Channels                       access the client-supplied title artwork and   movie. The 501 st  Airborne was trained to parachute   project is accompanied
               An Alpha channel is a special type of channel in which the   You can save a Quick Mask channel as a permanent Alpha   rating placeholder file.    kind of parachute image.
               value determines the degree of transparency of a pixel. In   channel by dragging the Quick Mask channel onto the New   functionality, and related   o  Find appropriate background and foreground     This movie is a joint venture between Sun and
               other words, a 50% value in the Alpha channel means that   Channel button at the bottom of the panel. This adds a   images for the movie theme (see the client’s   Tantamount, so both logos need to be included in   by a freeform project
               area of the image will be 50% transparent.  channel named “Quick Mask copy,” which remains even if   comments at right).  the new ad. It isn’t rated yet, so please use the “This
                         you exit Quick Mask mode. You can then double-click the
               When working in Quick Mask mode, a temporary Quick Mask   Alpha channel name in the panel to rename it, as we did in   o  Incorporate the title artwork, logos, and   Movie Is Not Yet Rated” artwork as a placeholder.
               channel stores the degree of transparency based on the   the following image (naming the channel “Lion Head”).  tools are presented in   rating placeholder that the client provided.    Create this ad big enough to fit on an 8.53 1 113
               current selection. A semi-transparent red overlay shows areas   o  Composite the different elements into a single   page, but keep the live area 13 inside the trim so the
               being masked (i.e., the areas that are not included in the   completed file. Save both a layered version   ad can be used in different-sized magazines.  assignment in which
               current selection).                                and a flattened version.
                             Permanent Alpha channel  Foundations discussions
                             Temporary Quick Mask channel                                 you practice skills and
                             New Channel button
                                        throughout the book.
                         You can change the appearance of an Alpha channel mask by
                         double-clicking a channel thumbnail in the Channels panel. In    exercise creativity,
                         the top half of the resulting dialog box, you can change the
                         overlay to show selected areas                    project justification
                         instead of the default masked areas.
                         Clicking the Color swatch opens a                                resulting in an extensive
               Quick Masks are useful when you need to work with a   Color Picker, where you can change
               temporary selection, or if you are still defining the exact   the color of the Quick Mask overlay.
               selection area. As long as you stay in Quick Mask mode, the   You can also use the Opacity field to change the transparency
               temporary Alpha channel remains in the Channels panel   of the overlay (the default is 50%). Keep in mind that these
               (listed as “Quick Mask”). If you return to Standard mode, the   settings only affect the appearance of the mask in Photoshop;   and diverse portfolio of
               Quick Mask disappears from the window and the panel.  the density of the selection is not affected by changing the
                         overlay opacity.
                                                                                          finished work.
                            Project 1: Composite Movie Ad  69
                                                                              Project 1: Composite Movie Ad  93
            Advice and Warnings
                7.  With the marching ants active, choose Select>Modify>Feather.
               Photoshop offers a number of options for modifying an existing selection   Visual Summary
               marquee.
                •  Select>Grow expands the selection to include all adjacent pixels that fall
                 within the tolerance defined for the Magic Wand tool.
                •  Select>Similar expands the selection to include all pixels throughout the
                 image that fall within the tolerance range, even if they are not adjacent to   PROJECT SUMMARY
                 the active selection.
                •  Select>Transform Selection shows bounding-box handles around the
                 selection marquee, which you can use to transform the selection as you   Making selections is one of the most basic — and most important — skills that you will learn in
                 would transform layer content.                 Photoshop. Selections are so important that Photoshop dedicates an entire menu to the process.
                                                                As you created the movie ad in this project, you used a number of skills and techniques that you
               In the Select>Modify menu:                       will apply in many (if not all) projects you build in Photoshop. You learned a number of ways to   Using an annotated
                •  Border creates a selection of a defined number of pixels around the edge of the   make both simple and complex selections, and you will learn additional methods in later projects.
                 active marquee.                                You also learned how to work with multiple layers, which will be an important part of virtually every
                •  Smooth helps to clean up stray pixels at the edge of a selection. Within   Photoshop project you create, both in this book and throughout your career.
                 a defined radius from the selection edge, pixels with less than half of the   Throughout the book,
                 surrounding pixels are excluded from the selection.           Make a basic selection   version of the finished
                •  Expand and Contract enlarge and shrink, respectively, a selection by a defined   with a Marquee tool
                 number of pixels.
                •  Feather creates a blended edge to the active selection area.  Note:  sidebars provide   Composite images by   Create a feathered selection   project, the Visual
                                                                               to blend one layer into another
                                                                 dragging from one
                8.  In the resulting dialog box, type 35 in the Feather Radius field. Click OK   You could also create a   document to another  Create a silhouette using
                                feathered selection by
               to return to the image window.  typing in the Feather           the Select Color Range utility
               Feathering means to soften the edge of a selection so the image   field of the Options bar   Transform a regular layer
               blends into the background, instead of showing a sharp line   before drawing the   shortcuts, warnings, or   Composite images by   Create a silhouette using   Summary quickly iden-
                                                                               the Quick Selection tool
               around the edge. The Feather Radius defines the distance from solid to transparent.   selection marquee.  copying and pasting
               In the image window, there’s no apparent difference in the selection because the
               marching ants can’t show shades of a selection.   Keep in mind, however,   Refine a selection using
                                                                               the Select and Mask utility
                                that if you draw a feath-       Incorporate vector graphics
                9.  Click the Edit in Quick Mask Mode button at the bottom of the Tools   ered selection (using the   useful tips about the   into a raster image  tifies the skills used
               panel to toggle into Quick Mask mode.  tool option setting), you   Move layer content   Use a layer mask to hide
               This mode creates a temporary red overlay that identifies unselected areas. By default,   can’t undo the feather   around on the canvas  pixels on a layer
               the overlay is semi-transparent, which allows you to see the underlying image.   without also undoing
                                        topic at hand.            Object layers           to complete different
                                the selection area.              Embed files as Smart
                                                                 Transform a Smart
                                                                  Object layer
                The semi-transparent
                overlay shows the smooth                                                  aspects of the job.
                transition that was created
                by feathering the selection.
                 Edit in Quick Mask
                 mode button
               10.  Click the Edit in Standard Mode button at the bottom of the Tools panel
               to toggle off the Quick Mask.
               When Quick Mask mode is active, the Edit in Quick Mask Mode button toggles to
               become the Edit in Standard Mode button.
                            Project 1: Composite Movie Ad  67
                                                               94 94  Project 1: Composite Movie Ad
                                                                                                           v