


Page 31 - CS6_PS_Look_Inside
P. 31
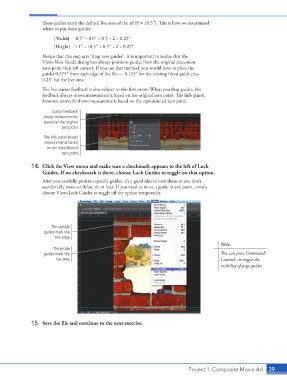
These guides mark the defined live area of the ad (8 1 10.5″). This is how we determined
                        where to put these guides:
                            [Width]   8.5″ – 8.0″ = 0.5 ÷ 2 = 0.25″
                            [Height]   11″ – 10.5″ = 0.5″ ÷ 2 = 0.25″

                        Notice that this step says “drag new guides”. It is important to realize that the
                        View>New Guide dialog box always positions guides from the original document
                        zero-point (top-left corner); If you use that method, you would have to place the
                        guides 0.375″ from each edge of the file — 0.125″ for the existing bleed guide plus
                        0.25″ for the live area.
                        The live cursor feedback is also subject to this limitation. When you drag guides, the
                        feedback always shows measurements based on the original zero point. The Info panel,
                        however, correctly shows measurements based on the repositioned zero point.

                            Cursor feedback
                        shows measurements
                        based on the original
                                zero point.

                        The Info panel shows
                         measurements based
                          on the repositioned
                                zero point.

                   14.  Click the View menu and make sure a checkmark appears to the left of Lock
                        Guides. If no checkmark is there, choose Lock Guides to toggle on that option.
                        After you carefully position specific guides, it’s a good idea to lock them so you don’t
                        accidentally move or delete them later. If you need to move a guide at any point, simply
                        choose View>Lock Guides to toggle off the option temporarily.


                           The outside
                        guides mark the
                             trim edge.
                                                                                                 Note:
                            The inside
                        guides mark the                                                          You can press Command/
                             live area.                                                          Control-; to toggle the
                                                                                                 visibility of page guides.


                   15.  Save the file and continue to the next exercise.


                                                                                    Project 1: Composite Movie Ad   39

