


Page 18 - CS6_PS_Look_Inside
P. 18
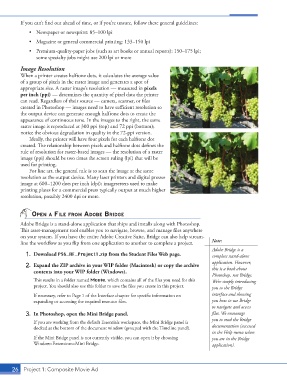
If you can’t find out ahead of time, or if you’re unsure, follow these general guidelines:

                  •  Newspaper or newsprint: 85–100 lpi
                  •  Magazine or general commercial printing: 133–150 lpi

                  •  Premium-quality-paper jobs (such as art books or annual reports): 150–175 lpi;
                     some specialty jobs might use 200 lpi or more

               Image Resolution
               When a printer creates halftone dots, it calculates the average value
               of a group of pixels in the raster image and generates a spot of
               appropriate size. A raster image’s resolution — measured in pixels
               per inch (ppi) — determines the quantity of pixel data the printer
               can read. Regardless of their source — camera, scanner, or files
               created in Photoshop — images need to have sufficient resolution so
               the output device can generate enough halftone dots to create the
               appearance of continuous tone. In the images to the right, the same
               raster image is reproduced at 300 ppi (top) and 72 ppi (bottom);
               notice the obvious degradation in quality in the 72-ppi version.
                  Ideally, the printer will have four pixels for each halftone dot
               created. The relationship between pixels and halftone dots defines the
               rule of resolution for raster-based images — the resolution of a raster
               image (ppi) should be two times the screen ruling (lpi) that will be
               used for printing.
                  For line art, the general rule is to scan the image at the same
               resolution as the output device. Many laser printers and digital presses
               image at 600–1200 dots per inch (dpi); imagesetters used to make
               printing plates for a commercial press typically output at much higher
               resolution, possibly 2400 dpi or more.


                   open A file froM Adobe bridge
               Adobe Bridge is a stand-alone application that ships and installs along with Photoshop.
               This asset-management tool enables you to navigate, browse, and manage files anywhere
               on your system. If you have the entire Adobe Creative Suite, Bridge can also help stream-
               line the workflow as you flip from one application to another to complete a project.   Note:
                                                                                             Adobe Bridge is a
                 1.  Download PS6_RF_Project1.zip from the Student Files Web page.           complete stand-alone
                                                                                             application. However,
                 2.  Expand the ZIP archive in your WIP folder (Macintosh) or copy the archive   this is a book about
                    contents into your WIP folder (Windows).
                                                                                             Photoshop, not Bridge.
                    This results in a folder named Movie, which contains all of the files you need for this   We’re simply introducing
                    project. You should also use this folder to save the files you create in this project.  you to the Bridge
                    If necessary, refer to Page 1 of the Interface chapter for specific information on   interface and showing
                    expanding or accessing the required resource files.                      you how to use Bridge
                                                                                             to navigate and access
                 3.  In Photoshop, open the Mini Bridge panel.                               files. We encourage
                                                                                             you to read the Bridge
                    If you are working from the default Essentials workspace, the Mini Bridge panel is
                    docked at the bottom of the document window (grouped with the Timeline panel).  documentation (accessed
                                                                                             in the Help menu when
                    If the Mini Bridge panel is not currently visible, you can open it by choosing   you are in the Bridge
                    Window>Extensions>Mini Bridge.                                           application).


           26 Project 1: Composite Movie Ad

