
Page 5 - Adobe Photoshop 2022
P. 5
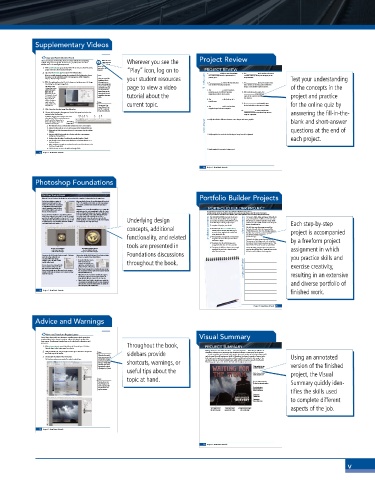
Supplementary Videos
Copy and Paste Selected Pixels Project Review
Like many processes in Photoshop, there are various methods for compositing Watch the videos Wherever you see the
multiple images into a single file. In this exercise, you will use the most basic Using Selection
selection tool — the Rectangle Marquee tool. Tool in Photo
shop, Parts 1 and 2 in
1. With cd-artwork.psd open, choose View>Fit on Screen to show the entire your online student
image centered in the document window. resources. “Play” icon, log on to PROJECT REVIEW
2. Open the file Tornado.jpg from your WIP>Music folder. 1. _______________ is likely to cause degradation 6. The _______________ tool is used to select areas
If you see a profile mismatch warning when opening the files for this project, choose Note: of a raster image when it’s reproduced on a of similar color by clicking and dragging in the
the option to use the embedded profile. Color management will be explained in printing press. image window.
Project 3: Museum Image Correction. When you created the your student resources Test your understanding
background file for fill in the blank
3. With Tornado.jpg the active file in the document window, open the Image this project, you cre- 2. A _______________ is a linked file that you place 7. The _______________ tool can be used to drag
Size dialog box (Image>Image Size). ated a raster image that into another Photoshop document. layer contents to another position within the
This image is only contains pixels. Digital page to view a video image, or into another open document. of the concepts in the
150 ppi, but it has a photographs and scans
physical size much are also pixel-based, 3. The _______________ is context sensitive,
larger than the which is why you use providing access to different functions 8. When selecting color ranges, the
defined size for the Photoshop to edit and depending on which tool is active. _______________ value determines how
CD artwork. As with manipulate those types tutorial about the much of the current color range falls into project and practice
the original image, of files.
the principle of 4. The _______________ is the final size of a the selection.
effective resolution printed page.
might make this Note:
image usable in the current topic. 9. A _______________ can be used to non- for the online quiz by
composite ad. You can press Com- destructively hide certain areas of a layer.
mand-Option-I/Con- 5. The _______________ tool is used to draw
4. Click Cancel to close the Image Size dialog box. trol-Alt-I to open the irregular-shaped selection marquees.
Image Size dialog box. 10. _______________ is a lossy compression
5. Choose the Rectangular Marquee tool in the Tools panel and review the method that is best used when large file size answering the fill-in-the-
options in the Options bar. might be a problem.
By default, dragging with a marquee tool creates A B C D E F G H
a new selection. You can use the buttons on
the left end of the Options bar to 1. Briefly describe the difference between raster images and vector graphics. blank and short-answer
define what happens if you draw Rectangular
more than one marquee. Marquee tool
A. New Selection creates a new selection each time you create a new marquee. short answer
B. Add to Selection adds the area of a new marquee to the existing selected area.
C. Subtract from Selection removes the area of a new marquee from the existing questions at the end of
selection.
D. Intersect with Selection results in a selection only where a new marquee 2. Briefly explain three methods for isolating an image from its background.
overlaps an existing selection.
E. Feather softens the edges of a selection by a specified number of pixels. each project.
F. Use the Style menu to choose a normal selection, a fixed-ratio selection, or a
fixed-size selection.
G. When Fixed Ratio or Fixed Size is selected, enter the size of the selection in the
Width and Height fields.
H. Click this button to reverse the Width and Height fields. 3. Briefly explain the concept of a layer mask.
42 Project 1: New Music Artwork
88 Project 1: New Music Artwork
Photoshop Foundations
The Crop Tools in Depth Portfolio Builder Projects
When the Crop tool is selected, the Options bar can be used to define a number of settings related to the cropped area.
The first menu includes a number of When you finalize the crop, the resulting image will be resized
common aspect ratio presets. If you to 9 9, regardless of the actual size of the crop marquee.
choose one of these, the crop marquee This presents a problem if you remember the principles of
is constrained to the specified aspect resolution.
ratio. It’s important to note that these PORTFOLIO BUILDER PROJECT
presets define only the aspect ratio of Enlarging a 3 3 area (for example) to 9 9 means the
application needs to create enough pixels to fill in the 6 extra
the crop, not the actual size. Use what you have learned in this project to complete the following freeform exercise.
inches. At 300 ppi, Photoshop needs to create (“interpolate”) Carefully read the art director and client comments, then create your own design to meet the needs of the project.
You can also choose the W x H x Resolution option to more than 1800 pixels per linear inch. Although Photoshop Use the space below to sketch ideas. When finished, write a brief explanation of the reasoning behind your final design.
define custom settings for the result of a crop. For example, if can enlarge images with reasonable success, such a Your client’s friend liked your work on the new The movie is titled, Above and Beyond. Although the
you define the width and height of a crop area as 9 9 at significant amount of new data will not result in the best CD artwork. She would like to hire you again story is fictionalized, it will focus on the men who
300 ppi, when you click and drag to draw, the crop area will possible quality. As a general rule, you should avoid enlarging Underlying design to create the ad concept and final files for a new led the first U.S. Airborne unit (the 501st), which
be restricted to the same proportions defined in the Width raster images by such a large percentage.
and Height fields (in this example, 1:1). movie that they’re releasing early next year. client comments suffered more than 2,000 casualties in the European Each step-by-step
theater of World War II.
To complete this project, you should:
concepts, additional art director comments o Download the Airborne_PS22_PB.zip We don’t have any other images in mind, but project is accompanied
the final ad should reflect the time period (the
archive from the Student Files web page to
1940s) of the movie. The 501st Parachute Infantry
access the client-supplied title artwork and
rating placeholder file.
you should probably incorporate some kind of
functionality, and related o Find appropriate background and foreground Battalion was trained to parachute into battle, so
parachute image.
images for the movie theme (see the client’s
comments at right). This movie is a joint venture between Sun and by a freeform project
Tantamount, so both logos need to be included in
tools are presented in o Incorporate the title artwork, logos, and the new ad. It isn’t rated yet, so please use the “This
Movie Is Not Yet Rated” artwork as a placeholder.
rating placeholder that the client provided.
completed file; save both a layered version
The crop area is constrained The resulting cropped image is the o Composite the different elements into a single Create this ad big enough to fit on an 8.5″ 1 11″ assignment in which
to the aspect ratio of the actual size defined in the Crop and a flattened version. page, but keep the live area 1″ inside the trim so the
defined width and height. Image Size & Resolution dialog box. ad can be used in different-sized magazines.
You can use the Set Overlay Options menu ( ) to show a You can also click the Set Additional Crop Options button Foundations discussions
variety of overlays within the crop ( ) to access a variety of crop-related choices. you practice skills and
area; these follow basic design
principles, such as the Rule of Thirds • If you check the Use Classic
and the Golden Spiral. Mode option, the crop throughout the book.
marquee reverts to the same
You can also use the commands in this appearance and behavior as in exercise creativity,
menu to turn the overlay on or off. If previous versions of Photoshop.
you choose Auto Show Overlay, the • When Show Cropped Area is checked, the area outside project justification
selected overlay only appears when you drag the marquee the crop marquee remains visible in the document window
handles or click inside the marquee area to move the image until you finalize the crop.
inside the crop area. • When Auto Center Preview is checked, the crop area resulting in an extensive
will always be centered in the document window. The
image dynamically moves as you resize the crop area.
• When Enable Crop Shield is checked, areas outside the
crop marquee are partially obscured by a semi-transparent and diverse portfolio of
solid color. You can use the related options to change the
color and opacity of the shielded area.
finished work.
36 Project 1: New Music Artwork
Project 1: New Music Artwork 89
Advice and Warnings
Move and Transform Regular Layers
Smart Object layers enable non-destructive transformations, which means those Visual Summary
transformations can be changed or undone without affecting the quality of the
layer content. Transforming a regular layer, on the other hand, is destructive and
permanent. Throughout the book,
1. With cd-artwork.psd open, hide all but the Tornado layer. Click the PROJECT SUMMARY
Tornado layer in the Layers panel to select it.
2. Using the Move tool, drag the layer content up so there is no transparent Note: Making selections is one of the most basic — and most important — skills that you will learn in
area at the top of the canvas. sidebars provide Photoshop. Selections are so important that Photoshop dedicates an entire menu to the process.
When the Move tool is As you created the music artwork in this project, you used a number of techniques that you will
3. Choose Edit>Transform>Flip Horizontal. active, you can move the apply in many (if not all) projects you build in Photoshop. You learned a number of ways to make Using an annotated
both simple and complex selections, and you will learn additional methods in later projects. You
The Transform submenu commands affect only the selected layer. selected object or layer 1 also learned how to work with multiple layers, which will be an important part of virtually every
pixel by pressing the Ar- shortcuts, warnings, or
row keys. Pressing Shift Photoshop project you create, both in this book and throughout your career.
with any of the Arrow version of the finished
keys moves the selected Unify multiple files into
useful tips about the
object/layer by 10 pixels. a single composition
Make a basic selection
with a Marquee tool project, the Visual
topic at hand.
Note:
You can also use the Create a feathered selection Summary quickly iden-
Edit>Transform sub- to blend one layer into another
menu to apply specific
transformations to a Create and refine a
layer or selection. selection based on
colors in the image tifies the skills used
Transform a
regular layer
Transform a to complete different
Smart Object layer
aspects of the job.
Use a layer mask to Move layer content Incorporate vector graphics
hide pixels on a layer around on the canvas into a raster image
58 Project 1: New Music Artwork
90 90 Project 1: New Music Artwork
v