
Page 4 - Adobe Photoshop 2022
P. 4
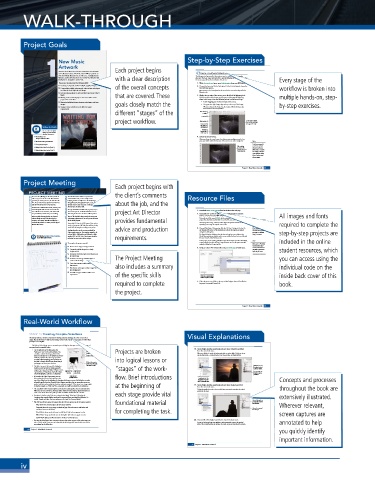
WALK-THROUGH
Project Goals
1 New Music Each project begins Step-by-Step Exercises
Artwork
You have been hired to create the artwork for a local band’s
Create a Feathered Selection
new collection release. The final artwork will be used for an
old-school vinyl album sleeve, in CD cases, on digital music
libraries, and in advertisements in a variety of printed media with a clear description The Marquee tool you used in the previous exercise created a basic rectangular
selection. The basic Lasso tool works like a pencil, following the path where you drag
(news papers, magazines, and so on). the mouse; you will use that method in this exercise. Every stage of the
This project incorporates the following skills: 1. With cd-artwork.psd open, open Lightning.jpg from your WIP>Music folder.
o Creating a composite ad from multiple supplied images of the overall concepts 2. Choose the Lasso tool in the Tools panel. In the Control panel, choose the
o Compositing multiple photographs, using various techniques New Selection option. workflow is broken into
to select the focal object in each image Most options in the Control panel are the same for the Lasso tool as they are for the
o Incorporating graphics as rasterized layers and Smart Object Marquee tools.
layers that are covered. These 3. Click at the top edge of the canvas, just to the left of the lightning bolt.
o Moving and transforming layer content in relation to the Hold down the mouse button and drag around the general lightning multiple hands-on, step-
page and to each other shape in the image. Keep the following points in mind as you drag:
o Managing individual layout elements using layers and layer goals closely match the • Avoid dragging past the bottom edge of the canvas.
groups • Drag past the right image edge and up to the top of the image. by-step exercises.
o Saving versions of a file to meet different output When you drag past the image edge, the marquee follows the image edge
requirements instead of the actual cursor position.
different “stages” of the New Selection
is active.
Lasso tool
project workflow. Click here first. The marquee follows
drag past the edge.
Drag around the image edge if you
the shape of
Videos to Watch the lightning.
Avoid the
Access these helpful bottom edge
videos in your online of the image.
student resources:
New Music Art 4. Release the mouse button.
Project Introduction When you release the mouse button, the software automatically connects the first
U
nderstanding Resolution point you clicked with the last location of the mouse cursor with a straight line. Note:
Cropping Images It isn’t uncommon for
a mouse to unexpect-
Using Selection Tools (Part 1) The selection edly jump when you
automatically
Using Selection Tools (Part 2) connects the start don’t want it to. If you
and end points.
aren’t happy with your
Lasso selection, choose
Select>Deselect, and
then try again.
Project 1: New Music Artwork 45
Project Meeting
Each project begins with
PROJECT MEETING The band loved the initial concept sketch I the client’s comments Resource Files
Our new disc, Waiting For the Storm, kind of
client comments goes away on military service, the wife waits for art director comments building the files. In addition to the band’s logo, about the job, and the
tells a story across the 11 tracks. The husband
submitted last week, so we’re ready to start
I’ve gathered the photographs I want to use. I also
him, he comes home but doesn’t remember her,
and she looks for answers to his amnesia.
already created a title treatment in Photoshop, so
I’ll send you that file as well.
Our band is a combination of rock, country, and
alternative/punk. We want the artwork for the
The special edition LP will be 10″, square, but you
new collection to be dramatic, and reflect both
1/4″ margin since the cover sleeve will be printed.
2. Expand the ZIP archive in your WIP folder (Macintosh) or copy the
our personalities, and the story we are telling.
archive contents into your WIP folder (Windows).
We’re actually releasing this first as a limited- need to incorporate a 1/8″ bleed allowance and a project Art Director 1. Download Music_PS22_RF.zip from the Student Files web page. All images and fonts
The 10″ file should be large enough for most print
edition album on vinyl. The sleeve for that advertising applications, so we can just use the same This results in a folder named Music, which contains all of the files you need for this Note:
version is 10″, square. We also need files for a file for those projects. provides fundamental project. You should also use this folder to save the files you create in this project. We are intention-
standard-size printed CD insert, and for digital A standard CD insert is 4.75″, square. That version If necessary, refer to Page 1 of the Interface chapter for specific information on ally overlooking issues of
libraries like iTunes. needs to incorporate 1/8″ bleeds as well, but it only expanding or accessing the required resource files. color space for the sake required to complete the
needs 1/8″ safe margin according to our printer. advice and production 3. Choose File>Open. If necessary, click the On Your Computer button in of this project. You will
learn about color spaces
For digital media, use the current standards for the bottom-left corner of the dialog box to show the system-standard and color management
iTunes music cover art. They require artwork to be navigation dialog box. in Project 3: Museum step-by-step projects are
at least 3000 × 3000 pixels, and delivered as high- The Open dialog box defaults to show the last-used option, so you might see the Image Correction.
Watch the video New Music Art Project Introduction quality JPEG or PNG files. That format should be Cloud Documents pane, which is used to access any files that have been saved directly
in your online student resources. sufficient for most other online catalogs. requirements. into your Creative Cloud (CC) account. Note: included in the online
In this project you are working with files on your local computer (or other local drive),
so you might need to click the Your Computer button to access the system-standard
project objectives o Resize a raster image to change resolution The Project Meeting 4. Navigate to your WIP>Music folder. Select Sunrise.jpg and click Open. Cloud file from your student resources, which
To complete this project, you will:
If you open a Photoshop
navigation dialog box for opening files.
account, the document
o Composite multiple images into a single
tab shows a cloud icon
background file
before the file name.
o Incorporate both raster and vector elements into
the same design
o Transform and arrange individual layers to
create a cohesive design
o Create layer groups to easily manage related you can access using the
layer content also includes a summary
o Use selection techniques to isolate images from individual code on the
their backgrounds
o Save different types of files for different ad
requirements of the specific skills Click here to access folders inside back cover of this
and files on your local drives.
required to complete 5. If the rulers are not visible on the top and left edges, choose View>Rulers book.
(or press Command/Control-R).
the project.
Project 1: New Music Artwork
Project 1: New Music Artwork 29
Real-World Workflow
STAGE 3 / Creating Complex Selections
Photoshop includes a number of options for making selections based on the color content of an Visual Explanations
image. The method you use will vary depending on the actual content of your image, as well as what
you hope to accomplish.
The Select>Color Range menu command opens a dialog box that you can use to select areas of
an image based on sampled colors.
• On the right side of the dialog box, the Projects are broken 18. Control/right-click the mask thumbnail and choose Disable Layer Mask
from the contextual menu.
Eyedropper tool is selected by default. You Eyedropper tool
can click a color in the image, either in the Add to Sample When you disable the mask, the background pixels are again visible. This is one advan-
document window or in the dialog box preview Subtract from Sample tage of using masks — masked pixels are not removed, they are simply hidden.
window, to define the color range you want
to select (called sampling). You can then use into logical lessons or
the Add to Sample and Subtract from Sample Click in the image to
eyedroppers to refine your selection. define the color range
• The Select menu at the top of the dialog box you want to select. When the mask is
includes several presets for isolating specific “stages” of the work- disabled, masked
pixels are visible.
ranges of primary colors (Reds, Yellows, Greens,
Cyans, Blues, or Magentas), or specific ranges Light areas are Dark areas are A red X indicates
of color (highlights, midtones, or shadows). selected. not selected. that the mask is
disabled.
• If you select the Skin Tones preset, you can Gray areas are flow. Brief introductions
then activate the Detect Faces option at the partially selected. Control/right-click the Concepts and processes
top of the dialog box. By adjusting the Fuzziness slider, you can use this dialog box to make thumbnail to open the
reasonably good selections of people’s skin. (Again, remember that no automatic option is a mask’s contextual menu.
perfect substitute when subjective decision-making is required. Other tones in an image might at the beginning of 19. Control/right-click the mask thumbnail and choose Apply Layer Mask
be similar enough to a “skin tone” that unwanted areas will be included in the selection.) from the contextual menu.
• The Localized Color Clusters option can be used to select specific areas of a selected color. This option applies the mask to the attached layer, permanently removing the masked throughout the book are
When this option is checked, the Range slider defines how far away (in physical distance) a pixels from the layer.
color can be located from the point you click and still be included in the selection. each stage provide vital
• Fuzziness is similar to the Tolerance setting for the Magic Wand tool. Changing the extensively illustrated.
Fuzziness value expands (higher numbers) or contracts (lower numbers) the selection. Be
careful, though, as higher fuzziness values can eliminate fine lines and detail. The masked pixels are
• The Selection Preview menu determines how the selection appears in the document window: foundational material permanently removed
from the layer.
– None shows the normal image in the document window. Wherever relevant,
– Grayscale shows the entire image in shades of gray. Selected areas are solid white and The mask is removed
unselected areas are solid black. for completing the task. from the layer.
– Black Matte shows unselected areas in solid black. Selected areas appear in color. screen captures are
– White Matte shows unselected areas in solid white. Selected areas appear in color.
– Quick Mask adds a partially transparent overlay to unselected areas.
• You can check the Invert box to return a selection that is the opposite of the color range you 20. Choose Edit>Undo Apply Layer Mask to restore the layer mask.
select. This is useful if you want to isolate (select) the background instead of the actual areas As you saw in the previous step, applying a mask permanently removes the masked annotated to help
you selected in the dialog box. pixels. This essentially defeats the purpose of a mask, so you are restoring it in this step.
you quickly identify
64 Project 1: New Music Artwork
important information.
72 Project 1: New Music Artwork
iv