
Page 42 - CC2017_DW_Look_Inside
P. 42
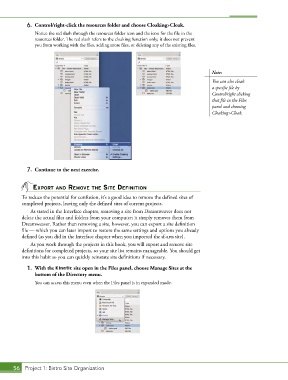
6.  Control/right-click the resources folder and choose Cloaking>Cloak.
               Notice the red slash through the resources folder icon and the icon for the file in the
               resources folder. The red slash refers to the cloaking function only; it does not prevent
               you from working with the files, adding more files, or deleting any of the existing files.


                                                                                        Note:
                                                                                        You can also cloak
                                                                                        a specific file by
                                                                                        Control/right clicking
                                                                                        that file in the Files
                                                                                        panel and choosing
                                                                                        Cloaking>Cloak.


            7.  Continue to the next exercise.


               exPort And remoVe the site deFinition
          To reduce the potential for confusion, it’s a good idea to remove the defined sites of
          completed projects, leaving only the defined sites of current projects.
              As stated in the Interface chapter, removing a site from Dreamweaver does not
          delete the actual files and folders from your computer; it simply removes them from
          Dreamweaver. Rather than removing a site, however, you can export a site definition
          file — which you can later import to restore the same settings and options you already
          defined (as you did in the Interface chapter when you imported the sf-arts site).
              As you work through the projects in this book, you will export and remove site
          definitions for completed projects, so your site list remains manageable. You should get
          into this habit so you can quickly reinstate site definitions if necessary.

            1.  With the Kinetic site open in the Files panel, choose Manage Sites at the
               bottom of the Directory menu.
               You can access this menu even when the Files panel is in expanded mode.


       56 Project 1: Bistro Site Organization