
Page 4 - CC2017_AN_Look_Inside
P. 4
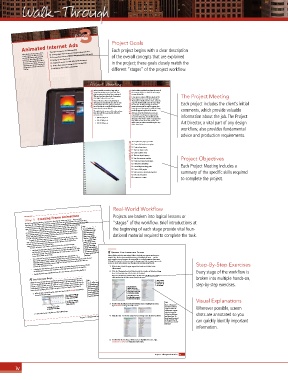
Walk-Through
3
3
3
3
project
Animated Internet Ads Project Goals
Each project begins with a clear description
Creating shape tweens to animate changes in shape and color
Your client wants to create a series is project incorporates the following skills:
of ads to place on Web sites that Creating classic tweens to animate changes in position and opacity of the overall concepts that are explained
are used by existing and potential
customers. ey have asked you Adding text to a Flash movie
to create a short animation rather Adapting le content to match di erent le dimensions in the project; these goals closely match the
than just a static image, in hopes of Using a Flash project to manage assets for multiple les
attracting more attention when the
ad appears in a browser with other Publishing a le to SWF for distribution
content. different “stages” of the project workflow.
Project Meeting Flash includes prede ned templates for most of
We’ve provided you with our logo and an
client comments image that we want to use in the ads. Since art director comments the common ad sizes, so that’s the easiest way The Project Meeting
these are going to be placed into a variety of
to start the rst le.
Web sites, we want some kind of animation
I want you to animate di erent aspects of the
that might help catch a user’s eye.
client’s logo over the course of the animation.
Most of the sites where we’re planning on
e kayaker is ideally suited to move across the
Each project includes the client’s initial
advertising use standard ad sizes. I’m not sure
stage. He should paddle across the stage while
exactly which sizes we’re going to purchase,
but we do like the rectangle and square shapes
pause and wait until the tagline appears, then
better than the narrow banners. the sun rises. Halfway through, he should comments, which provide valuable
move the rest of the way across while the image
We might decide on some of the other options gradually appears in place of the sunrise.
later, but we’d like to get started with three After you create the initial ad, you can use
common sizes: several built-in techniques to repurpose the information about the job. The Project
• 300 250 pixels content for other sizes. You should also take
advantage of the Project panel to manage assets
• 336 280 pixels that will be used in more than one le, so it
• 250 250 pixels will be easier to make universal changes in any Art Director, a vital part of any design
of the shared assets.
workflow, also provides fundamental
advice and production requirements.
To complete this project, you will:
project objectives Create a le based on a template
Create a shape tween
Tween an object’s color
Create a classic tween
Tween an object’s opacity
Stop the animation timeline
Create and control a text object Project Objectives
De ne font embedding Each Project Meeting includes a
Control object stacking order
Create a Flash project
Scale content to document properties summary of the specific skills required
Edit a shared symbol
Publish les to SWF to complete the project.
Real-World Workflow
Stage 3 Creating Frame Animations Projects are broken into logical lessons or
The basic underlying premise of animation is that objects change over time — from complex
transitions in color, shape, and opacity to moving a character to a new position. The most basic type
“stages” of the workflow. Brief introductions at
of animation is to simply replace one object with another at specific points in time; you will create this
type of animation in this stage of the kiosk project to make it seem like the girl is talking.
Repositioning or replacing objects on successive frames results in the appearance
The term playhead is
of movement when you watch an animation; in reality, your brain is being fooled — Note: video were shown on the beginning of each stage provide vital foun-
a throwback to the days
you’re simply seeing a series of images flash before your eyes (hence the application’s
when animation and
name). Your brain thinks it’s seeing movement, when in fact it’s simply processing a
dational material required to complete the task.
series of still images displayed in rapid succession.
To make an animation appear to run continuously, you can loop it so it starts
machines. The playhead
over at Frame 1 after reaching the last frame. (In fact, as you will see, looping is the physical tape-reading
is the component under
default state of an animation; you have to use code to prevent the timeline from
which the tape moves,
and the tape is read by
To create animation, you need to understand several terms and concepts:
automatically looping in the exported file.)
the player. By sliding
• The Flash Timeline panel shows a visual depiction of the passage of time.
the tape back and forth
Each fraction of a second is represented by a frame (the rectangles to the right
of the layer names). The playhead indicates the current point in time, or the
an animator could make
a movie run forward and
Organize YOur LibrarY with FOLders
frame that is visible on the Stage.
• The number of frames in one second (called frames per second, FPS, or underneath the playhead, Library folders work the same as layer folders; they help you organize and structure
backward.
frame rate) determines the length and quality of the overall animation. New
complex files. Movies often contain dozens or even hundreds of assets — and the
Flash files default to 24 fps, which is the standard frame rate of most film movies in the United
more complex a movie becomes, the more useful it is to clearly organize those assets.
States (although HD formats range as high as 120 fps). Animations only for the Web are
Although this step isn’t strictly necessary, it is always a good idea to organize your work
• A keyframe indicates the point in time at which something changes. If you want to change so you can more easily organize your thoughts and processes going forward. Step-By-Step Exercises
commonly developed at 15 fps.
1. With atrium_kiosk.fla open, expand the interface.ai folder in the
something, you need to insert a keyframe at the appropriate moment on the timeline.
Library panel.
• Regular frames between keyframes have the same content as the preceding keyframe. 2. Click the Illustrator Symbols folder (inside the interface.ai folder) and drag Every stage of the workflow is
down to the empty area at the bottom of the panel.
This moves the Illustrator Symbols folder to the first level of the library. The symbols, broken into multiple hands-on,
which are placed on the Stage, are not affected by the move.
Add StreAming Sound
Unlike the event sounds that you used in the previous exercises, stream sounds play Note: Click a column step-by-step exercises.
as soon as enough data is downloaded (called progressive downloading) to the user’s
Because stream sounds
computer. Stream sounds cannot be saved on a user’s computer; the sound file must be
heading to sort
are typically larger files
library items by
redownloaded every time it is played. Stream sounds are linked to the timeline, which
that category.
means they stop playing if the timeline stops (i.e., they are “timeline dependent”).
more data and larger file
Symbols folder to the
1. With atrium_kiosk.fla open, add a new layer named Talking immediately (longer sounds equal Drag the Illustrator
size), the quality of these
empty area at the bottom
sounds might be poor
of the panel to move it out
for users who have slow
of the interface.ai folder.
above the Mouths layer.
The empty circle indicates
that no content currently
resides on the keyframe. Internet connections. The highlight shows that
the folder will be moved to
the first level of the panel.
The filled circle indicates Visual Explanations
that some content exists Note:
on the keyframe. 3. Double-click the Illustrator Symbols folder name to highlight the name. If your Library panel
By default, the first frame Type buttons to change the folder name. is too short to show an Wherever possible, screen
of every layer is a keyframe. empty area below the
2. Select the Frame 1 keyframe of the Talking layer. current assets, Control/ shots are annotated so you
right-click any of the
existing first-level assets
Project 2: Talking Kiosk Interface 105 4. Click the start_over button symbol icon and drag it into the Buttons folder. and choose Paste. The
pasted symbols are pasted
at the same level as the can quickly identify important
asset where you Control/
right-click.
information.
5. Double-click the interface.ai folder name to highlight the name. Type
component artwork to change the folder name.
Project 2: Talking Kiosk Interface 95
iv