


Page 10 - CC2018_GD_Look_Inside
P. 10
Contents
          Contents


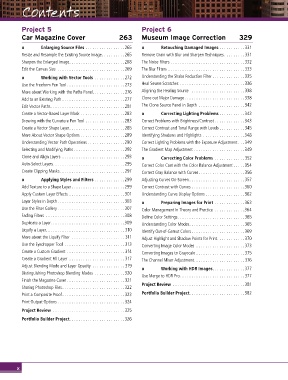
          Project 5                                        Project 6
          Car Magazine Cover                      263      Museum Image Correction                  329

          o       Enlarging Source Files .................265  o    Retouching Damaged Images ........... 331
          Resize and Resample the Existing Source Image..........265  Remove Grain with Blur and Sharpen Techniques......... 331
          Sharpen the Enlarged Image........................268  The Noise Filters ................................ 332
          Edit the Canvas Size .............................269  The Blur Filters .................................333
          o       Working with Vector Tools ............. 272  Understanding the Shake Reduction Filter .............. 335
          Use the Freeform Pen Tool ......................... 273  Heal Severe Scratches ............................336
          More about Working with the Paths Panel.............. 276  Aligning the Healing Source  .......................338
          Add to an Existing Path ...........................277  Clone out Major Damage..........................338
          Edit Vector Paths................................ 281  The Clone Source Panel in Depth ....................342
          Create a Vector-Based Layer Mask ...................283  o   Correcting Lighting Problems ...........343
          Drawing with the Curvature Pen Tool .................283  Correct Problems with Brightness/Contrast .............343
          Create a Vector Shape Layer........................285  Correct Contrast and Tonal Range with Levels ...........345
          More About Vector Shape Options ...................289  Identifying Shadows and Highlights ..................348
          Understanding Vector Path Operations ................290  Correct Lighting Problems with the Exposure Adjustment ...349
          Selecting and Modifying Paths ......................292  The Gradient Map Adjustment ......................349
          Clone and Align Layers ...........................293  o   Correcting Color Problems ............. 352
          Auto-Select Layers...............................295  Correct Color Cast with the Color Balance Adjustment .....354
          Create Clipping Masks............................297  Correct Gray Balance with Curves....................356

          o       Applying Styles and Filters .............299  Adjusting Curves On-Screen........................ 357
          Add Texture to a Shape Layer.......................299  Correct Contrast with Curves . . . . . . . . . . . . . . . . . . . . . . .360
          Apply Custom Layer Effects ........................ 301  Understanding Curve Display Options .................362
          Layer Styles in Depth .............................303  o   Preparing Images for Print .............363
          Use the Filter Gallery .............................307  Color Management in Theory and Practice  .............364
          Fading Filters ..................................308  Define Color Settings.............................365
          Duplicate a Layer................................309  Understanding Color Modes........................365
          Liquify a Layer.................................. 310  Identify Out-of-Gamut Colors.......................369
          More about the Liquify Filter ....................... 311  Adjust Highlight and Shadow Points for Print............ 370
          Use the Eyedropper Tool .......................... 313  Converting Image Color Modes ..................... 373
          Create a Custom Gradient ......................... 314  Converting Images to Grayscale ..................... 375
          Create a Gradient Fill Layer ........................ 317  The Channel Mixer Adjustment...................... 376
          Adjust Blending Mode and Layer Opacity  .............. 319  o   Working with HDR Images.............. 377
          Distinguishing Photoshop Blending Modes ............. 320  Use Merge to HDR Pro............................ 377
          Finish the Magazine Cover ......................... 321
                                                           Project Review ............................... 381
          Sharing Photoshop Files........................... 322
          Print a Composite Proof...........................323  Portfolio Builder Project........................382
          Print Output Options ............................. 324
          Project Review ............................... 325
          Portfolio Builder Project........................ 326


        x

