
Page 71 - Adobe Photoshop 2021
P. 71
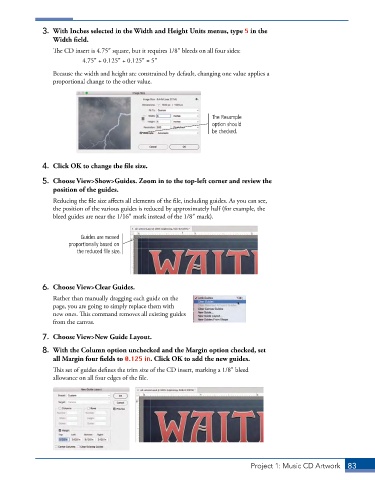
3.  With Inches selected in the Width and Height Units menus, type 5 in the
                 Width field.
                 The CD insert is 4.75″ square, but it requires 1/8″ bleeds on all four sides:
                          4.75″ + 0.125″ + 0.125″ = 5″
                 Because the width and height are constrained by default, changing one value applies a
                 proportional change to the other value.


                                                                  The Resample
                                                                  option should
                                                                  be checked.


              4.  Click OK to change the file size.

              5.  Choose View>Show>Guides. Zoom in to the top-left corner and review the
                 position of the guides.

                 Reducing the file size affects all elements of the file, including guides. As you can see,
                 the position of the various guides is reduced by approximately half (for example, the
                 bleed guides are near the 1/16″ mark instead of the 1/8″ mark).


                          Guides are moved
                      proportionally based on
                         the reduced file size.


              6.  Choose View>Clear Guides.
                 Rather than manually dragging each guide on the
                 page, you are going to simply replace them with
                 new ones. This command removes all existing guides
                 from the canvas.

              7.  Choose View>New Guide Layout.

              8.  With the Column option unchecked and the Margin option checked, set
                 all Margin four fields to 0.125 in. Click OK to add the new guides.
                 This set of guides defines the trim size of the CD insert, marking a 1/8″ bleed
                 allowance on all four edges of the file.


                                                                              Project 1: Music CD Artwork  83